Let's create a ToDo API powered by Postgres and Node.js with the help of Postman's API Builder
Prerequisites
- Basic experience with Postman Collections
- At least a beginner understanding of Node.js
- Comfort with the command line / shell
What You Will Learn
- How to create an API in Postman with an OpenAPI 3 definition.
- How to generate skeleton code for the API, using Postman.
- How to flesh out the code with a connection to Postgres and business logic.
- How to generate a Postman Collection from the API definition and send requests to the API.
What You Will Need
- Node.js Installed and in your path (required)
- Postgres Installed
- The Visual Studio Code editor Installed (recommended)
What You Will Build
- A ToDo API with Postgres & Node.js and a Postman Collection for it.
Installing Node.js
Download the Node.js installer for your operating system. The installer will generally add Node to your path for you. After installation, open a command line terminal and test that it's in your path by typing node --version at the command prompt.
If installed successfully, it will tell you the version you're running.
Installing Postgres
Download the Postgres GUI installer for your operating system and install Postgres. Follow the prompts, accept the defaults, and make sure to write down the password you set for the postgres user.
In the next step, let's create the database and user for the API back-end.
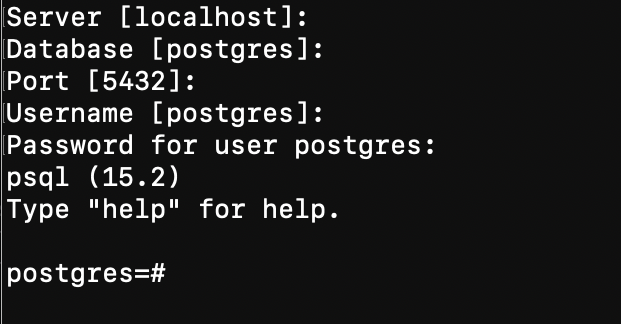
Let's create the database for the ToDo items. This section assumes you've installed Postgres. As part of its base installation, it installs a shell application called psql. This may not be automatically added to your path. Search for it in your operating system's search prompt and run it. It will open a terminal window and ask for some information to connect to the server.
Accept the defaults for server,database, port, and username. When you get to password, use the password you set for the postgres user in the previous section.
Run the following commands in the terminal window, one at a time. Remember that the semicolon is required at the end of the command.
- Create the database.
CREATE DATABASE todo WITH OWNER postgres;
- Switch to using the database for further commands. Following this, the command prompt will change from
postgres=#totodo=#.
\c todo
- Create a user for the API. Before you do this, the only other user is postgres and that is a superuser role with all of the privileges on the database. Creating a new role and scoping it just to the permissions required to do its work is always a good practice.
CREATE USER todo_admin WITH PASSWORD 'leelu_dallas_multipass_6';
- Create the database table to hold your ToDo items. This has three fields:
id_code: a unique key of (up 36 characters).to_do: the task to be done (up to 255 characters).completed: whether or not it's been completed (boolean).
CREATE TABLE todos (id_code varchar(36) NOT NULL UNIQUE, to_do varchar(255) NOT NULL, completed boolean);
- Grant the required privileges on the
todostable to the new user.
GRANT SELECT, INSERT, UPDATE ON todos TO todo_admin;
- At this point, the scaffolding is done, but let's add two items to the database so there's something when you start sending requests.
Item 1:
INSERT INTO todos (id_code, to_do, completed) VALUES ('todo1','Get something done', TRUE);
Item 2:
INSERT INTO todos (id_code, to_do, completed) VALUES ('todo2','Get another thing done', FALSE);
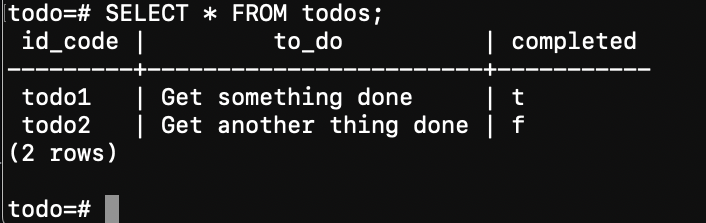
- Query the database to see the two items you added.
SELECT * FROM todos;
- Quit out of the Postgres shell.
\q
Next, use OpenAPI to define an API.
A good way to describe an API is to use the OpenAPI 3 standard, which describes the API in a machine-readable format.
Let's break up the description for better human readability and get an overview of how this is composed.
Download the full version of this API specification if you want to see it in its entirety.
The metadata
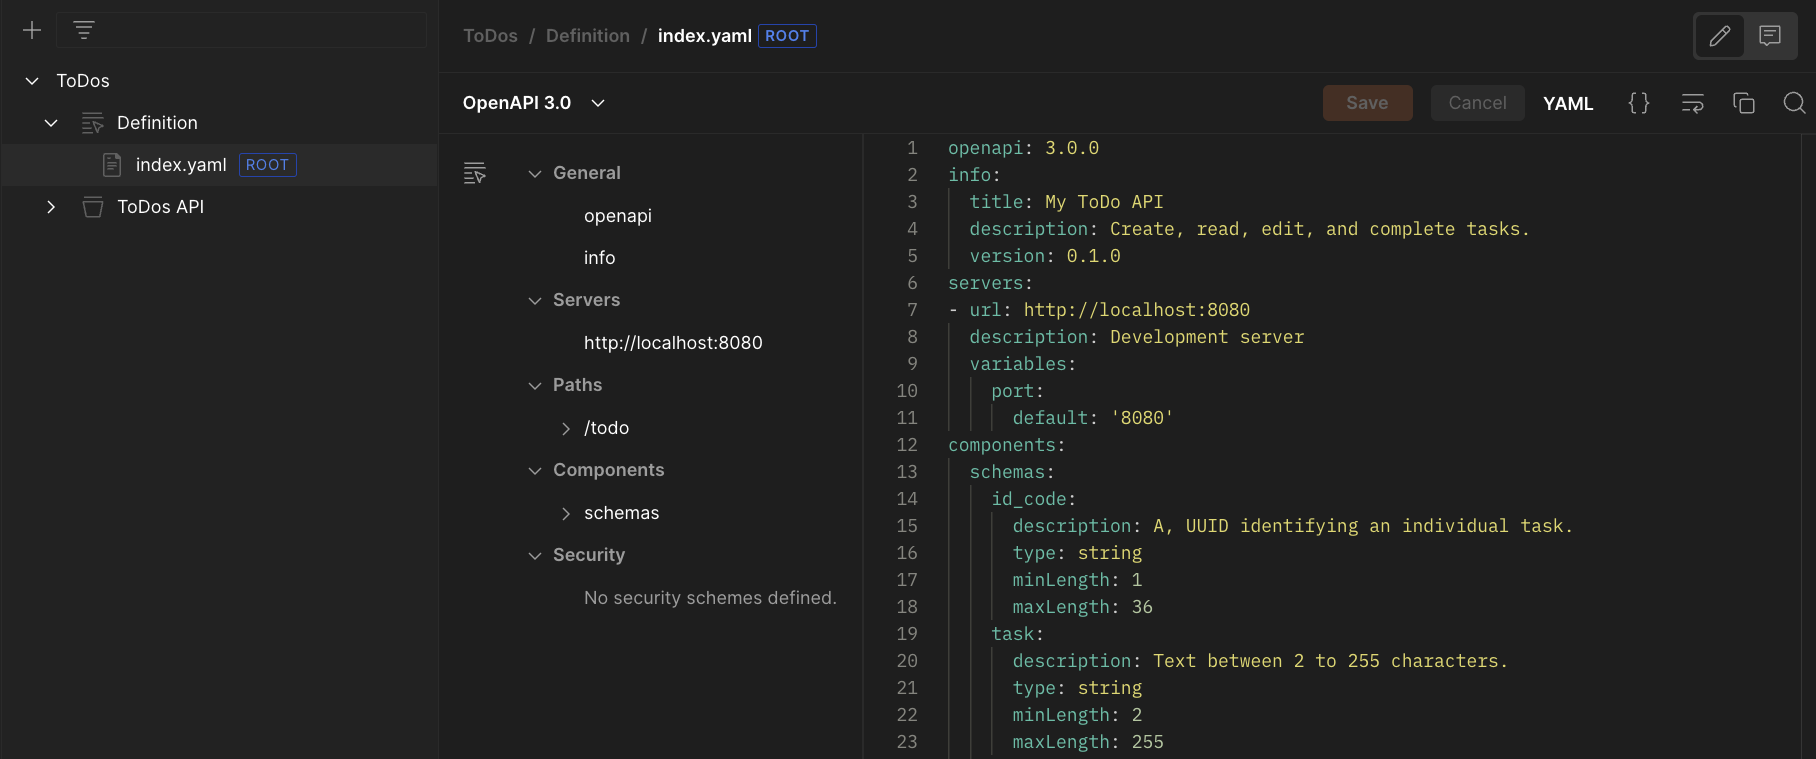
First, let's look at the metadata. You provide the version of OpenAPI you're using and an info object with information about the API that isn't necessarily crucial to its operation.
openapi: 3.1.0
info:
  title: My ToDo API
  description: Create, read, edit, and complete tasks.
  version: 0.1.0
The servers array
Next is a servers array with an object for each server, like development and production. A variables object provides values for each server, such as the selection of port 8080 as the default.
servers:
  - url: http://localhost
    description: Development server
    variables:
      port:
        default: 8080
The components object
In the components object, there is a schemas object to define each type of data the API will send or receive. Data types like the id_code will be used in multiple places. The $ref: [path to object] property reuses the existing id_code definition in the to_do object.
Note how the strings have minLength and maxLength values. Information like this is helpful for implementers and machine-generated documentation.
components:
  schemas:
    id_code:
      description: An UUID identifying an individual task.
      type: string
      minLength: 1
      maxLength: 36
    task:
      description: The text description of the task.
      type: string
      minLength: 2
      maxLength: 255
    completed:
      description: True means the task is complete, false means it is not.
      type: boolean
    complete:
      description: Use true to show all tasks, false to show only incomplete tasks.
      type: boolean
    to_do:
      description: An object containing a task's information
      type: object
      properties:
        idcode:
          $ref: "#/components/schemas/id_code"
        task:
          $ref: "#/components/schemas/task"
        completed:
          $ref: "#/components/schemas/completed"
    to_do_list:
      description: An array of toDo objects.
      type: array
      items:
        $ref: "#/components/schemas/ToDo"
    error_msg:
      type: object
      properties:
        message:
          type: string
The paths object
The paths object defines the paths for your API and how they handle various HTTP verbs like PUT and GET.
This API has a single path of /todo with definitions of what is required and what will be returned, depending on the type of action.
References to the data types ($ref:) from the schemas section are used here to keep the definitions shorter, adhere to DRY (Don't Repeat Yourself) principles, and stay consistent.
Here are the action types and how they're defined:
- GET: Returns a list of all ToDos that have not been marked complete. If a
completeparameter (boolean) is added to the request and the value istrue, completed ToDos will be included in the list. - POST: Creates a new ToDo. It requires the data be submitted as
application/x-www-form-urlencodedwith ataskparameter (string) with the text of the ToDo (up to 255 characters). Acompleteparameter (boolean) is optional if you want the task to be marked as already complete when you add it. - PUT: Updates an existing ToDo. It requires the data be submitted as
application/x-www-form-urlencoded. It requires at least one of the following parameters and can contain both:- A
taskparameter (string) with the updated text of the ToDo (up to 255 characters). - A
completedparameter (boolean) to update the status.
- A
paths:
  /todo:
    get:
      description: Gets a list of all items or all incomplete items.
      parameters:
        - name: complete
          in: query
          required: false
          schema:
            $ref: "#/components/schemas/complete"
      responses:
        "200":
          description: OK
          content:
            application/json:
              schema:
                $ref: "#/components/schemas/to_do_list"
    post:
      description: Create a to-do item.
      requestBody:
        content:
          application/x-www-form-urlencoded:
            schema:
              type: object
              properties:
                task:
                  $ref: "#/components/schemas/task"
                completed:
                  $ref: "#/components/schemas/completed"
              required:
                - task
      responses:
        "200":
          description: Returns a copy of the new ToDo object.
          content:
            "application/json":
              schema:
                $ref: "#/components/schemas/to_do"
        "400":
          description: Creation failed. Returns an error.
          content:
            "application/json":
              schema:
                $ref: "#/components/schemas/error_msg"
    put:
      description: Update a to-do item.
      requestBody:
        content:
          application/x-www-form-urlencoded:
            schema:
              type: object
              properties:
                id_code:
                  $ref: "#/components/schemas/id_code"
                task:
                  $ref: "#/components/schemas/task"
                completed:
                  $ref: "#/components/schemas/completed"
              required:
                - id_code
      responses:
        "200":
          description: Item updated. Returns the item's updated ToDo object.
          content:
            "application/json":
              schema:
                $ref: "#/components/schemas/to_do"
        "400":
          description: Update failed. Returns an error message.
          content:
            "application/json":
              schema:
                $ref: "#/components/schemas/error_msg"
Read the OpenAPI 3 standard if you'd like to dive deeper into constructing API definitions with it.
Next, add the API to Postman.
With the Postman app or web client open, go to your Personal Collection and select the APIs icon. Then Create an API.

The API is created, but it's untitled and empty.
- Name it "ToDos" by selecting the pencil icon that appears when you hover over the name.
- Select the + symbol to the right of the Definition option. It presents a submenu of Import files or Author from scratch.
- Select Author from scratch.
- Select or accept
OpenAPI 3.0as the Definition type andYAMLas the Definition Format. - Select Create Definition. This opens a code editor.
- Copy the full ToDo API definition from this link.
- Paste the definition into the code editor.
- Select Save.
You're ready to code your API in the next step.
Postman offers code generation to scaffold your API for multiple programming languages. This project uses Node.js.
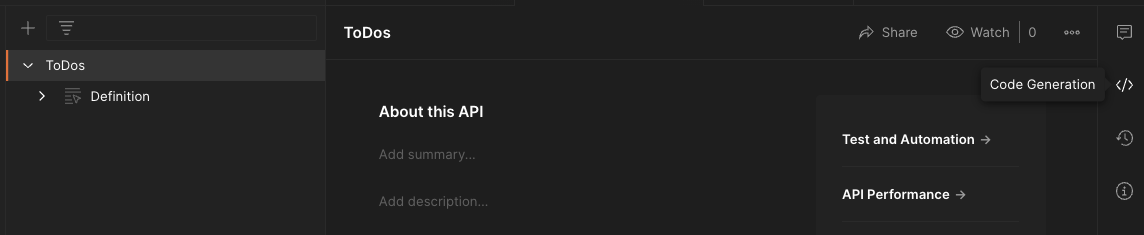
Return to the top level of the API in the navigation. Select the </> icon to open the code generator.
The wizard asks what Language and framework you want and offers an option to Only generate routes and interfaces. Choose NodeJs - Express as the language and framework and leave option to limit what it generates unchecked.
Select Generate code and it will prompt you to download a zip file.
If you do not want to download and update the code, there is a link to fully functioning API code at the end of this section. The rest of this section focuses on adding a database connection and the code for the GET method as an example.
Going the DIY route
If you want to code this yourself, take these preliminary steps.
- Unzip the code you downloaded into a project folder.
- Open a terminal window and navigate into the project folder.
- Enter
npm installin the terminal window. This will install the prerequisites specified by the gode generator. - Add a Postgres connector for Express. This code will also add it to your
project.jsonfile in case you're planning to save this to source control and skip this step in the future.
npm install pg-promise --save
Enter npm run start in the terminal window.
At this point, the server will run and return mock data that looks like a single entry. By default, the server runs at port 3000. When it's running, go to localhost:3000 and it will return the results of a GET. Enter ctrl + c in the terminal window to stop it.
Editing server.js
Note how you had to go to port 3000 above, but the API definition specifies port 8080.
In the project root folder, open server.js with an editor. At or around line 10, replace the value of 3000 with 8080 in this line.
  // old
    PORT = process.env.PORT || 3000,
  // new
    PORT = process.env.PORT || 8080,
Save it and move on.
Editing services/todos.js
Navigate from the root folder of the project to the services folder and open todos.js in an editor. This file is where the business logic lives and where the root functions for the API methods live.
Add the following code at the top.
const crypto = require("crypto");
const pgp = require("pg-promise")();
const db = pgp(
  "postgres://todo_admin:leelu_dallas_multipass_6@localhost:5432/todo"
);
const PS = pgp.PreparedStatement;
This pulls in Node's built-in crypto module to generate UUIDs for the POST function and sets up the Postgres module with a database connection. Then it simplifies the pg-promise module's class for prepared functions, which is used to ensure booleans are properly handled in the database queries.
Let's look at the code for the GET function from above. It creates a demo of the array specified in the API description with mock values.
var data = [
    {
      complete: "<Complete>",
      idcode: "<IdCode>",
      task: "<Task>",
    },
  ],
  status = "200";

return {
  status: status,
  data: data,
};
Replace that code with this code and save the file.
//compose the query
let listTodos = {};
let result = {};

// create a query with a prepared statement
if (options.completed && options.completed.toLowerCase() === "true") {
  listTodos = new PS({ name: "list-all-todos", text: "SELECT * FROM todos" });
} else {
  listTodos = new PS({
    name: "list-todos",
    text: "SELECT * FROM todos WHERE completed = $1",
    values: false,
  });
}

//query the database
try {
  result = await db.any(listTodos);
} catch (err) {
  console.log(err);
  throw new Error(err);
}

return {
  status: 200,
  data: result,
};
Express provides the query string parameters in the options object. First, the code checks if there is a completed parameter and then if the value is true (as a string). The default is only to get all ToDos that are not completed. The modified query when completed is true gets all ToDos, regardless of status.
If you want to dig into the code for the other two operations, download the complete working code at the ToDo API project repository on GitHub.
Next, let's put the API through its paces with Postman.
Generate a Postman Collection
Return to the API you created in Postman. Select the + icon by Collections and choose Generate from definition.

In the generator details, give your collection a name, leave the rest of the values at their defaults, and select Generate Collection.
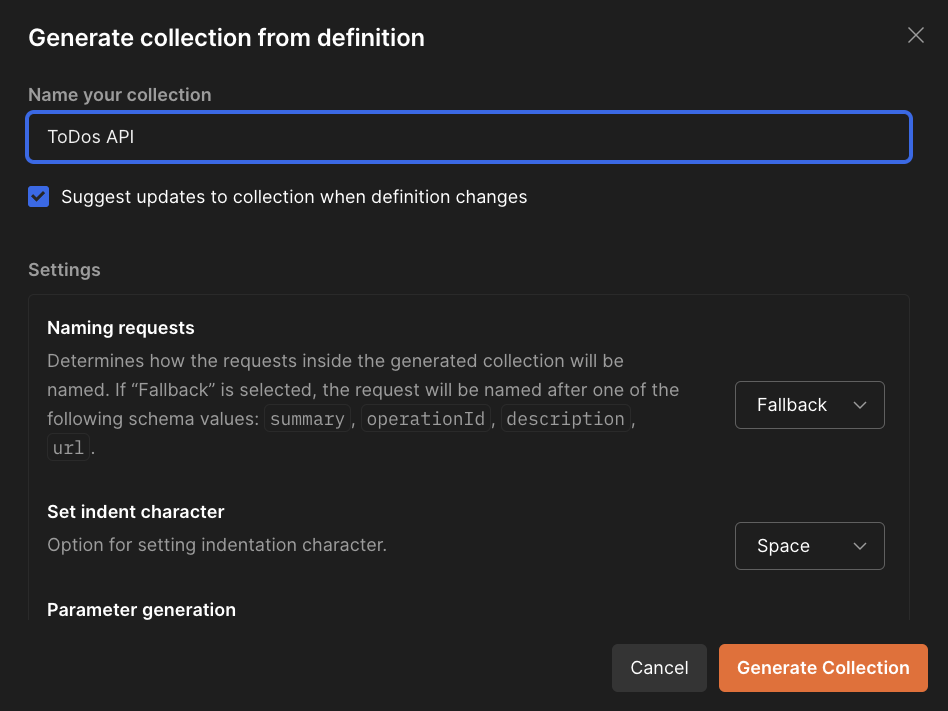
When the collection is generated, it is a child of the API, not the higher-level Collections part of the workspace. Queries for GET, POST. and PUT are created.
Run a ToDo server
Make sure your Postgres database is running in the XAMPP control panel.
- Clone the ToDo API Project repository from GitHub into a local folder.
- Open a terminal and navigate into the top-level directory.
- In the terminal, issue the command:
npm install. - When that completes, issue the command:
node server.js
You're ready to try your queries. The SQL you ran previously pre-populated the database with two items, so you have some data.
Try a GET
Select Send and the API will return an array with the incomplete ToDo as an object.
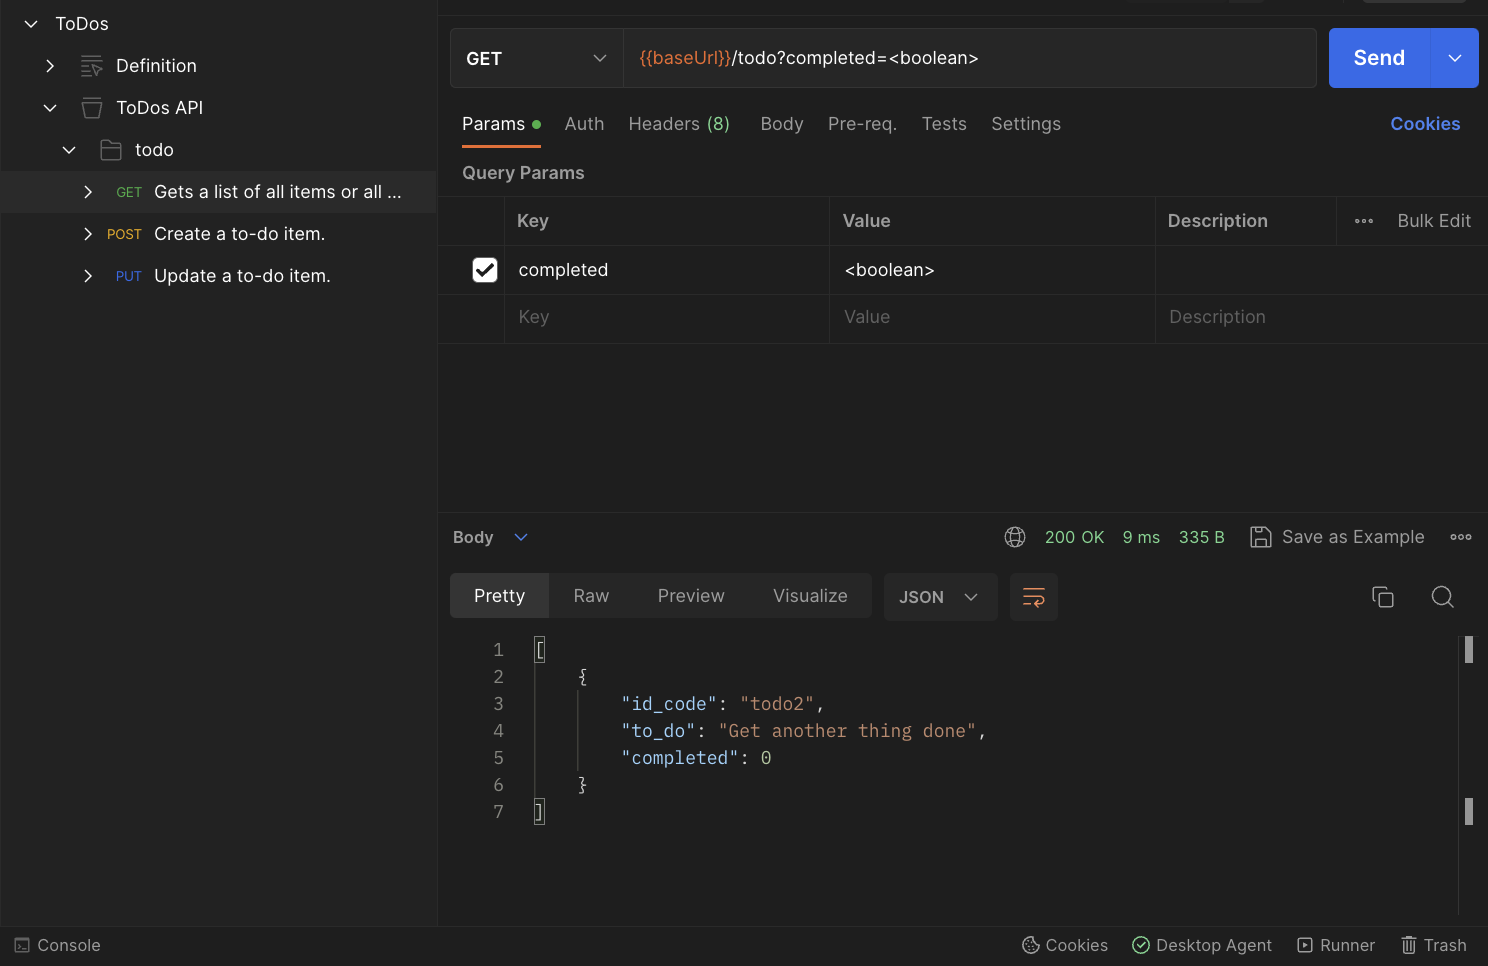
NOTE: You may need to have the Postman Desktop Agent running or the Send button will be disabled.
Try changing <boolean> in the parameters to true to get an array with both of the ToDo objects.
Try a POST
Select the POST from the collection then select the Body tab to see the parameters.
Replace them with a task you want to add and its completion status. The task string is defined as being between 2 and 255 characters long. The status must be the word "true" or "false" in lowercase or Postman will note a validation error. If you uncheck it, the server will default to false.
Select Send to add the task to the database. It will return a ToDo object with the values you submitted and the generated id_code.
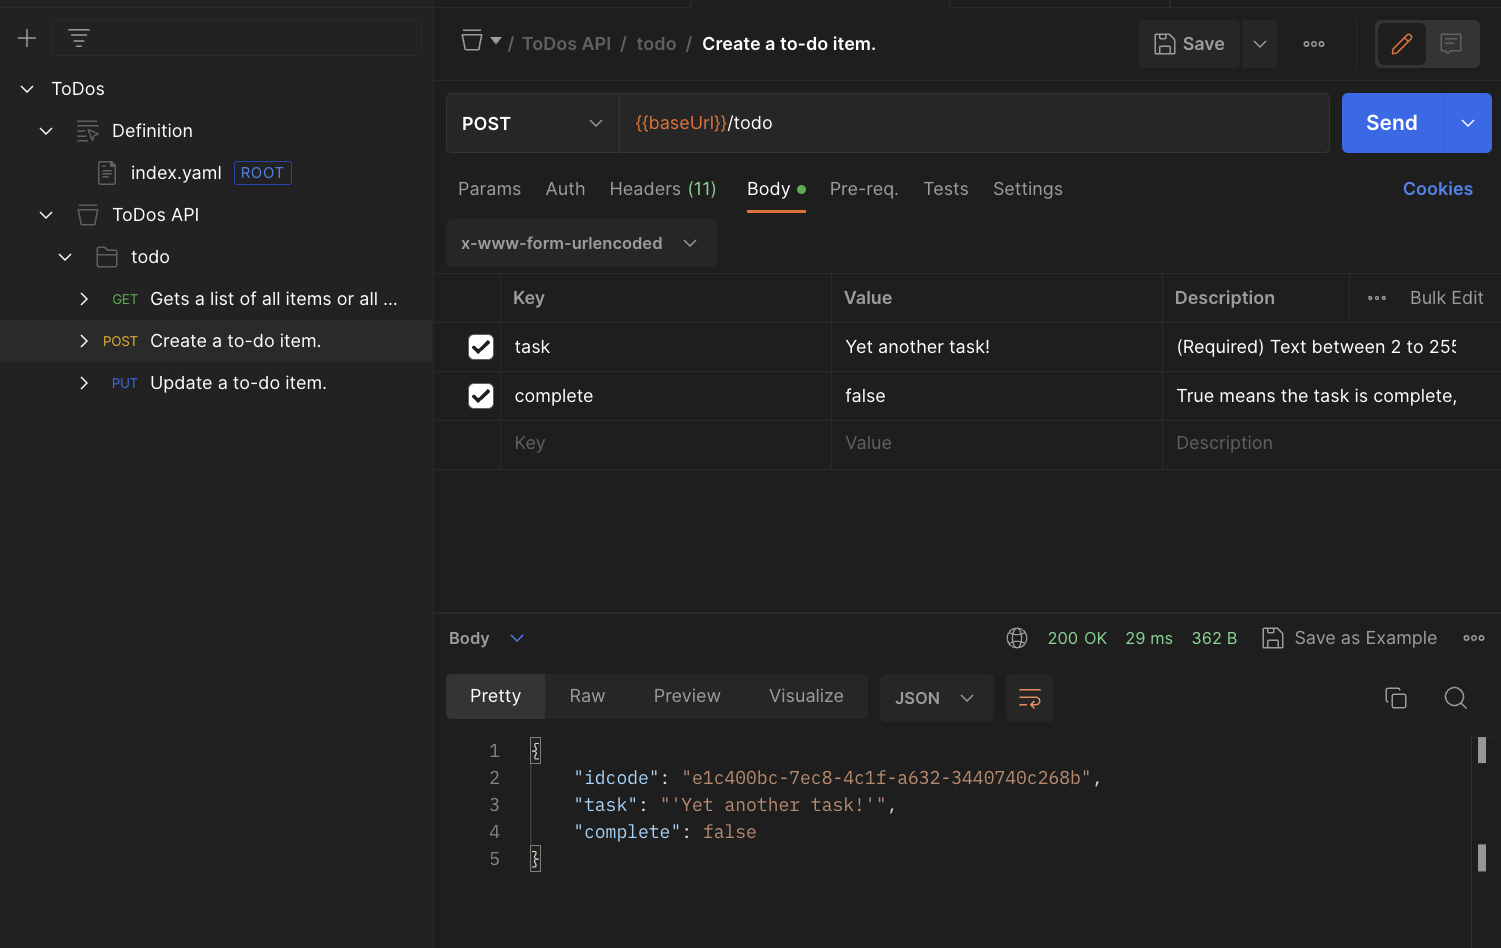
Go back to the GET and run it if you want to confirm the task was added to the database.
Try a PUT
Like the POST, the parameters are in the Body tab.
The only required item is the id_code. If you want to submit an empty field for the task or complete fields, uncheck them on the left rather than changing the mock value to an empty one. If you uncheck both, the server returns a 400 Bad Request because there's nothing to update.
- Set the
id_codefield to "todo2" (one of the pre-populated ToDo items) - Set
completeto "true", and uncheck thetaskfield. This will update the database entry as completed. - Select Send.
The server makes the change, then queries the database for the item and returns the whole item to confirm the update.
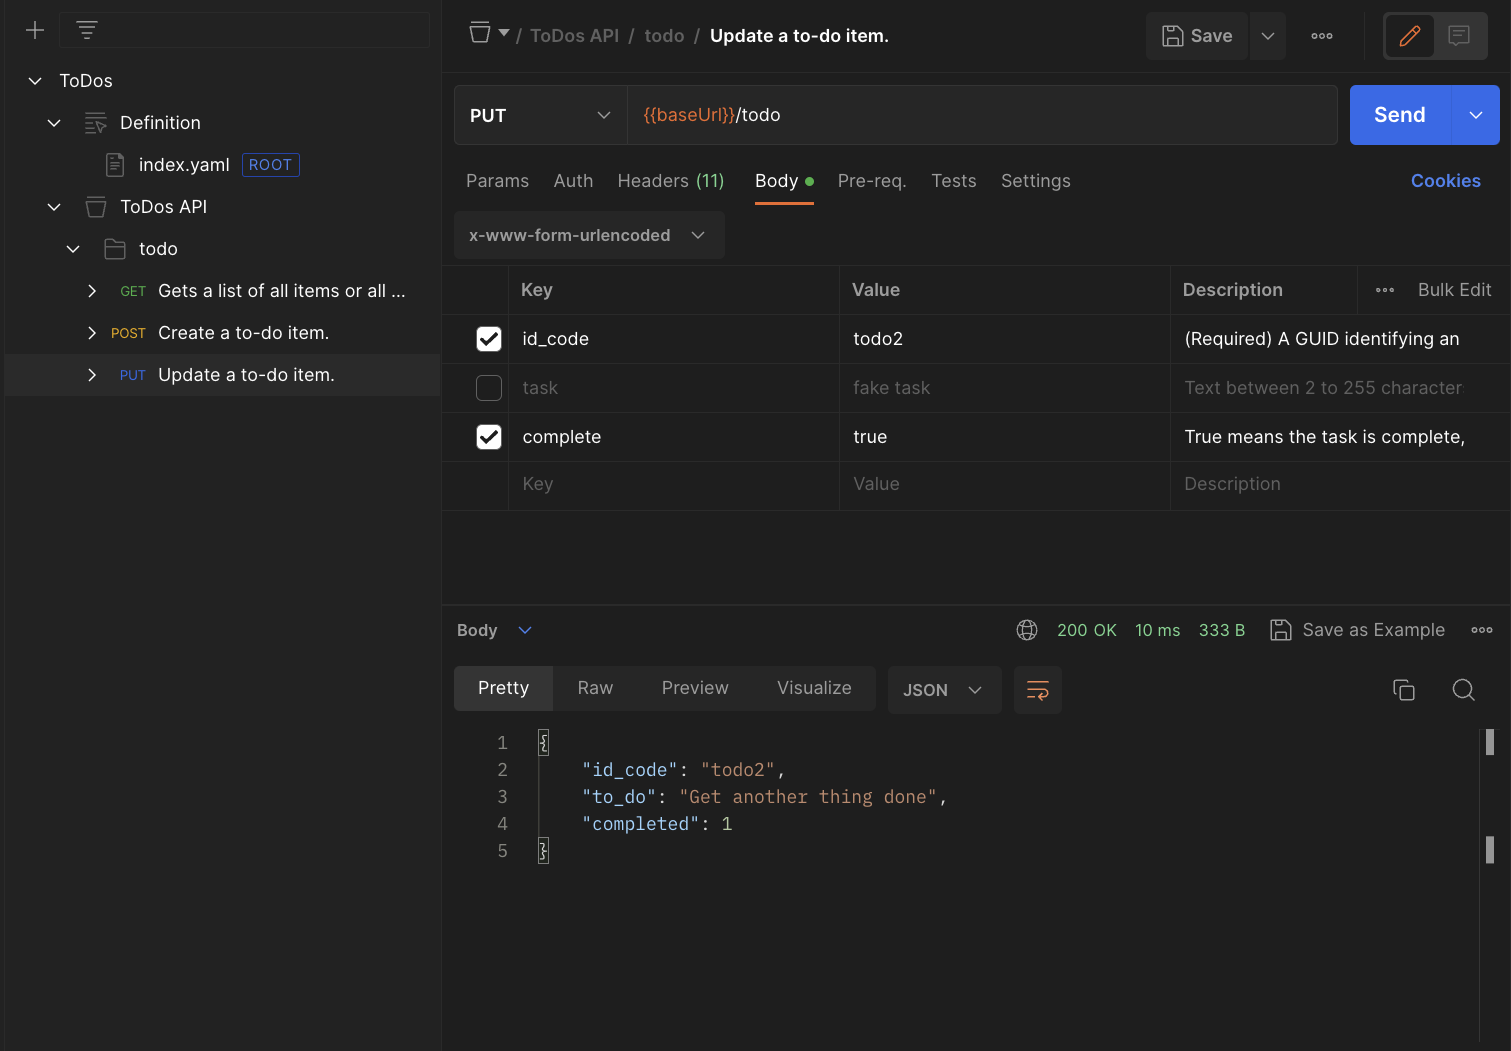
Go back to the GET and run it with completed unchecked to see the task is no longer active.
You're done. Congratulations! You've defined an API with OpenAPI 3.0, generated skeleton server code, generated a Postman Collection to send requests to the server, and made changes to the database.
Next, look at some ways you can continue with this.
Here are some things you can do if you want to learn more.
- Read the OpenAPI 3 standard and add a
DELETEmethod to the API specification. - Update the Postgres server permissions for
todo_adminand Node.js server code to add aDELETEmethod, then regenerate your collection to test theDELETEmethod. - Clean up your system by uninstalling Node.js and Postgres if you don't intend to keep them.