Postman is an API platform for building and using APIs. Postman simplifies each step of the API lifecycle and streamlines collaboration so that you can create better APIs faster.
You can use the Microsoft Graph Postman collection to get started with Microsoft Graph APIs in minutes.
This article explains how to get up and running with Postman and Microsoft Graph. You can also explore Microsoft Graph APIs directly in your web browser by using Graph Explorer.
For details about how to use Postman, follow the steps in this article or watch the Getting started with Microsoft Graph Postman workspace video.
- Update the request URL, replacing
graph.microsoft.comwith the Microsoft Graph service root endpoint for your national cloud. - Update the Auth URL and Access Token URL values on the Authorization tab of the Delegated and Application folders, replacing
login.microsoftonline.comwith the Azure AD endpoint for your national cloud. - Update the Scope value on the Authorization tab of the Delegated and Application folders, replacing
graph.microsoft.comwith the Microsoft Graph service root endpoint for your national cloud.
Prerequisites
- A developer tenant through the Microsoft 365 Developer Program.
- Sign up for a free Postman account, and then sign in.
- Download and install the Postman desktop agent, which will enable you to use the web version of Postman
What You'll Learn
- Create an Azure AD application
- Run your first delegated request
- Run your first application request
What You'll Build
- A Postman Collection with authorized API requests
To use the Postman collection, fork it to your own Postman workspace. Do this from the web browser.
- Go to Postman and sign in.
- Go to the Postman collection labeled Microsoft Graph.
- Fill in a label for your own fork; this can be any text.
- Under Workspace, ensure that My Workspace is selected in the dropdown list.
- Select Fork Collection.
You are redirected to a fork of the main Microsoft Graph Postman collection in your own workspace.
To use this particular Postman collection in your web browser, download the Postman Desktop Agent. You can't use Postman for the web without this due to CORS restrictions in the web browser.
You don't need the agent if you're using the Postman for Windows app. If you open Postman for Windows, you see this forked collection in your workspace.
To use this collection in your own developer tenant, create an Azure Active Directory (Azure AD) application and give it the appropriate permissions for the requests that you want to call. If you don't have a developer tenant, you can sign up for one through the Microsoft 365 Developer Program.
- Go to portal.azure.com and sign in with your developer tenant administrator account.
- Under Azure Services, select Azure Active Directory.
- On the left menu, select App registrations.
- On the horizontal menu, select New registration.
- Set the Application name to
Postman. - From the dropdown menu, select Web.
- Set the Redirect URI to
https://oauth.pstmn.io/v1/browser-callback. - Select Register.
- On the left menu, select API Permissions.
- On the horizontal menu, select Add a permission, select Microsoft Graph, and then select Delegated Permissions.
- Type
Mail., expand the Mail options, and then selectMail.Read. - Select Application permissions, type
User., and then select Application Permissions. - Expand the User options, and then select
User.Read.All. - Select Add permissions.
- On the horizontal menu, select Grant admin consent for, and then select Yes.
- On the left menu, select Overview. From here, you can get the application (client) ID and directory (tenant) ID. You'll need these in the next step.
- On the left menu, select Certificates and secrets.
- Select New client secret, enter a description, and then select Add. Hover over the new client secret Value and copy it; you'll need this in the next step.
The application now has two permissions configured. Mail.Read is added as a delegated permission, which is a permission that requires a signed-in user. The application can read mail on behalf of the user. User.Read.All is added as an application permission, which is a permission that does not require a signed-in user. The application can read users in Azure AD.
In this step, you set up the environment variables in Postman that you use to retrieve an access token.
- Go to Fork environment.
- Add a label for the fork. This can be any text.
- Under Workspace, ensure that My Workspace is selected in the dropdown list.
- Select Fork Environment.
- In
ClientID, set the Current value to the application (client) ID value from the previous step. - In
ClientSecret, set the Current value to the client secret value from the previous step. - In
TenantID, set the Current value to the directory (tenant) ID value from the previous step. - On the top right, select Save.
- Close the Manage Environments tab.
- On the top right, next to the eye icon, verify that M365 Environment is selected in the dropdown and not No environment.
Because this is the first time that you are running a request as a delegated authentication flow, you need to get an access token.
- Select the Delegated folder.
- Select the Authorization tab.
- In the Configure New Token section, select the Configuration Options tab. 1. Make sure the call back URL matches with what you provided when you created the application registration. Leave all the fields as pre-configured, including the Grant type, which is set to
Authorization Code. - Scroll down on the right and select Get New Access Token.
- Sign in with your developer tenant administrator account.
- Select Proceed, and then select the Use Token button.
You now have a valid access token to use for delegated requests.
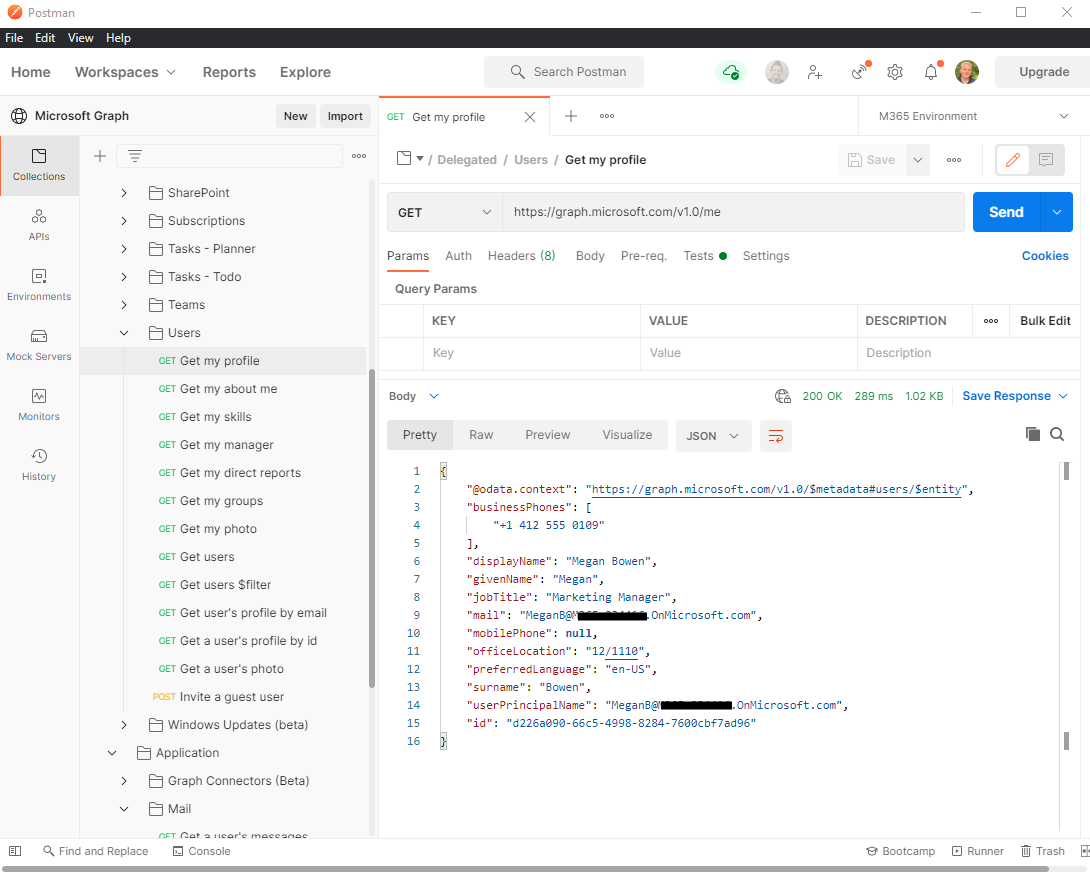
Inside the Delegated folder are requests for various Microsoft Graph workloads that you can call.
- Expand the Delegated folder, and then expand the Mail folder.
- Double-click Get my messages to open the request.
- On the top right, select Send.
You have now successfully made a Microsoft Graph call using delegated authentication.
Because this is the first time that you are running a request as an application authentication flow, you need to get an access token.
- Select the Application folder.
- Select the Authorization tab.
- In the Configure New Token section, select the Configuration Options tab. Leave all the fields as pre-configured, including the Grant type, which is set to 1Client Credentials1.
- Scroll down on the right and select Get New Access Token.
- Select Proceed, and then select the Use Token button.
You now have a valid access token to use for application requests.
Inside the Application folder are requests for various Microsoft Graph workloads that you can call.
- Expand the Application folder, and then expand the User folder.
- Double-click Get Users to open the request.
- On the top right, select Send.
You have now successfully made a Microsoft Graph call using application authentication.
You can follow these steps to make other requests to Microsoft Graph. Remember that you have to add permissions to your Azure AD application for other requests to work; otherwise, you get permission denied errors in your responses.
Contribute to the collection
If you want to contribute your own requests, you need a Postman license. You can make your changes to the forked collection, and then hover over the collection top node and select Create pull request.
Known issues
Authentication fails with "You can't get there from here"
Certain conditional access policies configured by your organization's administrators can block the authentication flow from Postman. To explore alternatives, contact your administrators.