Prerequisites
- Familiarity with DIY home automation and Home Assistant
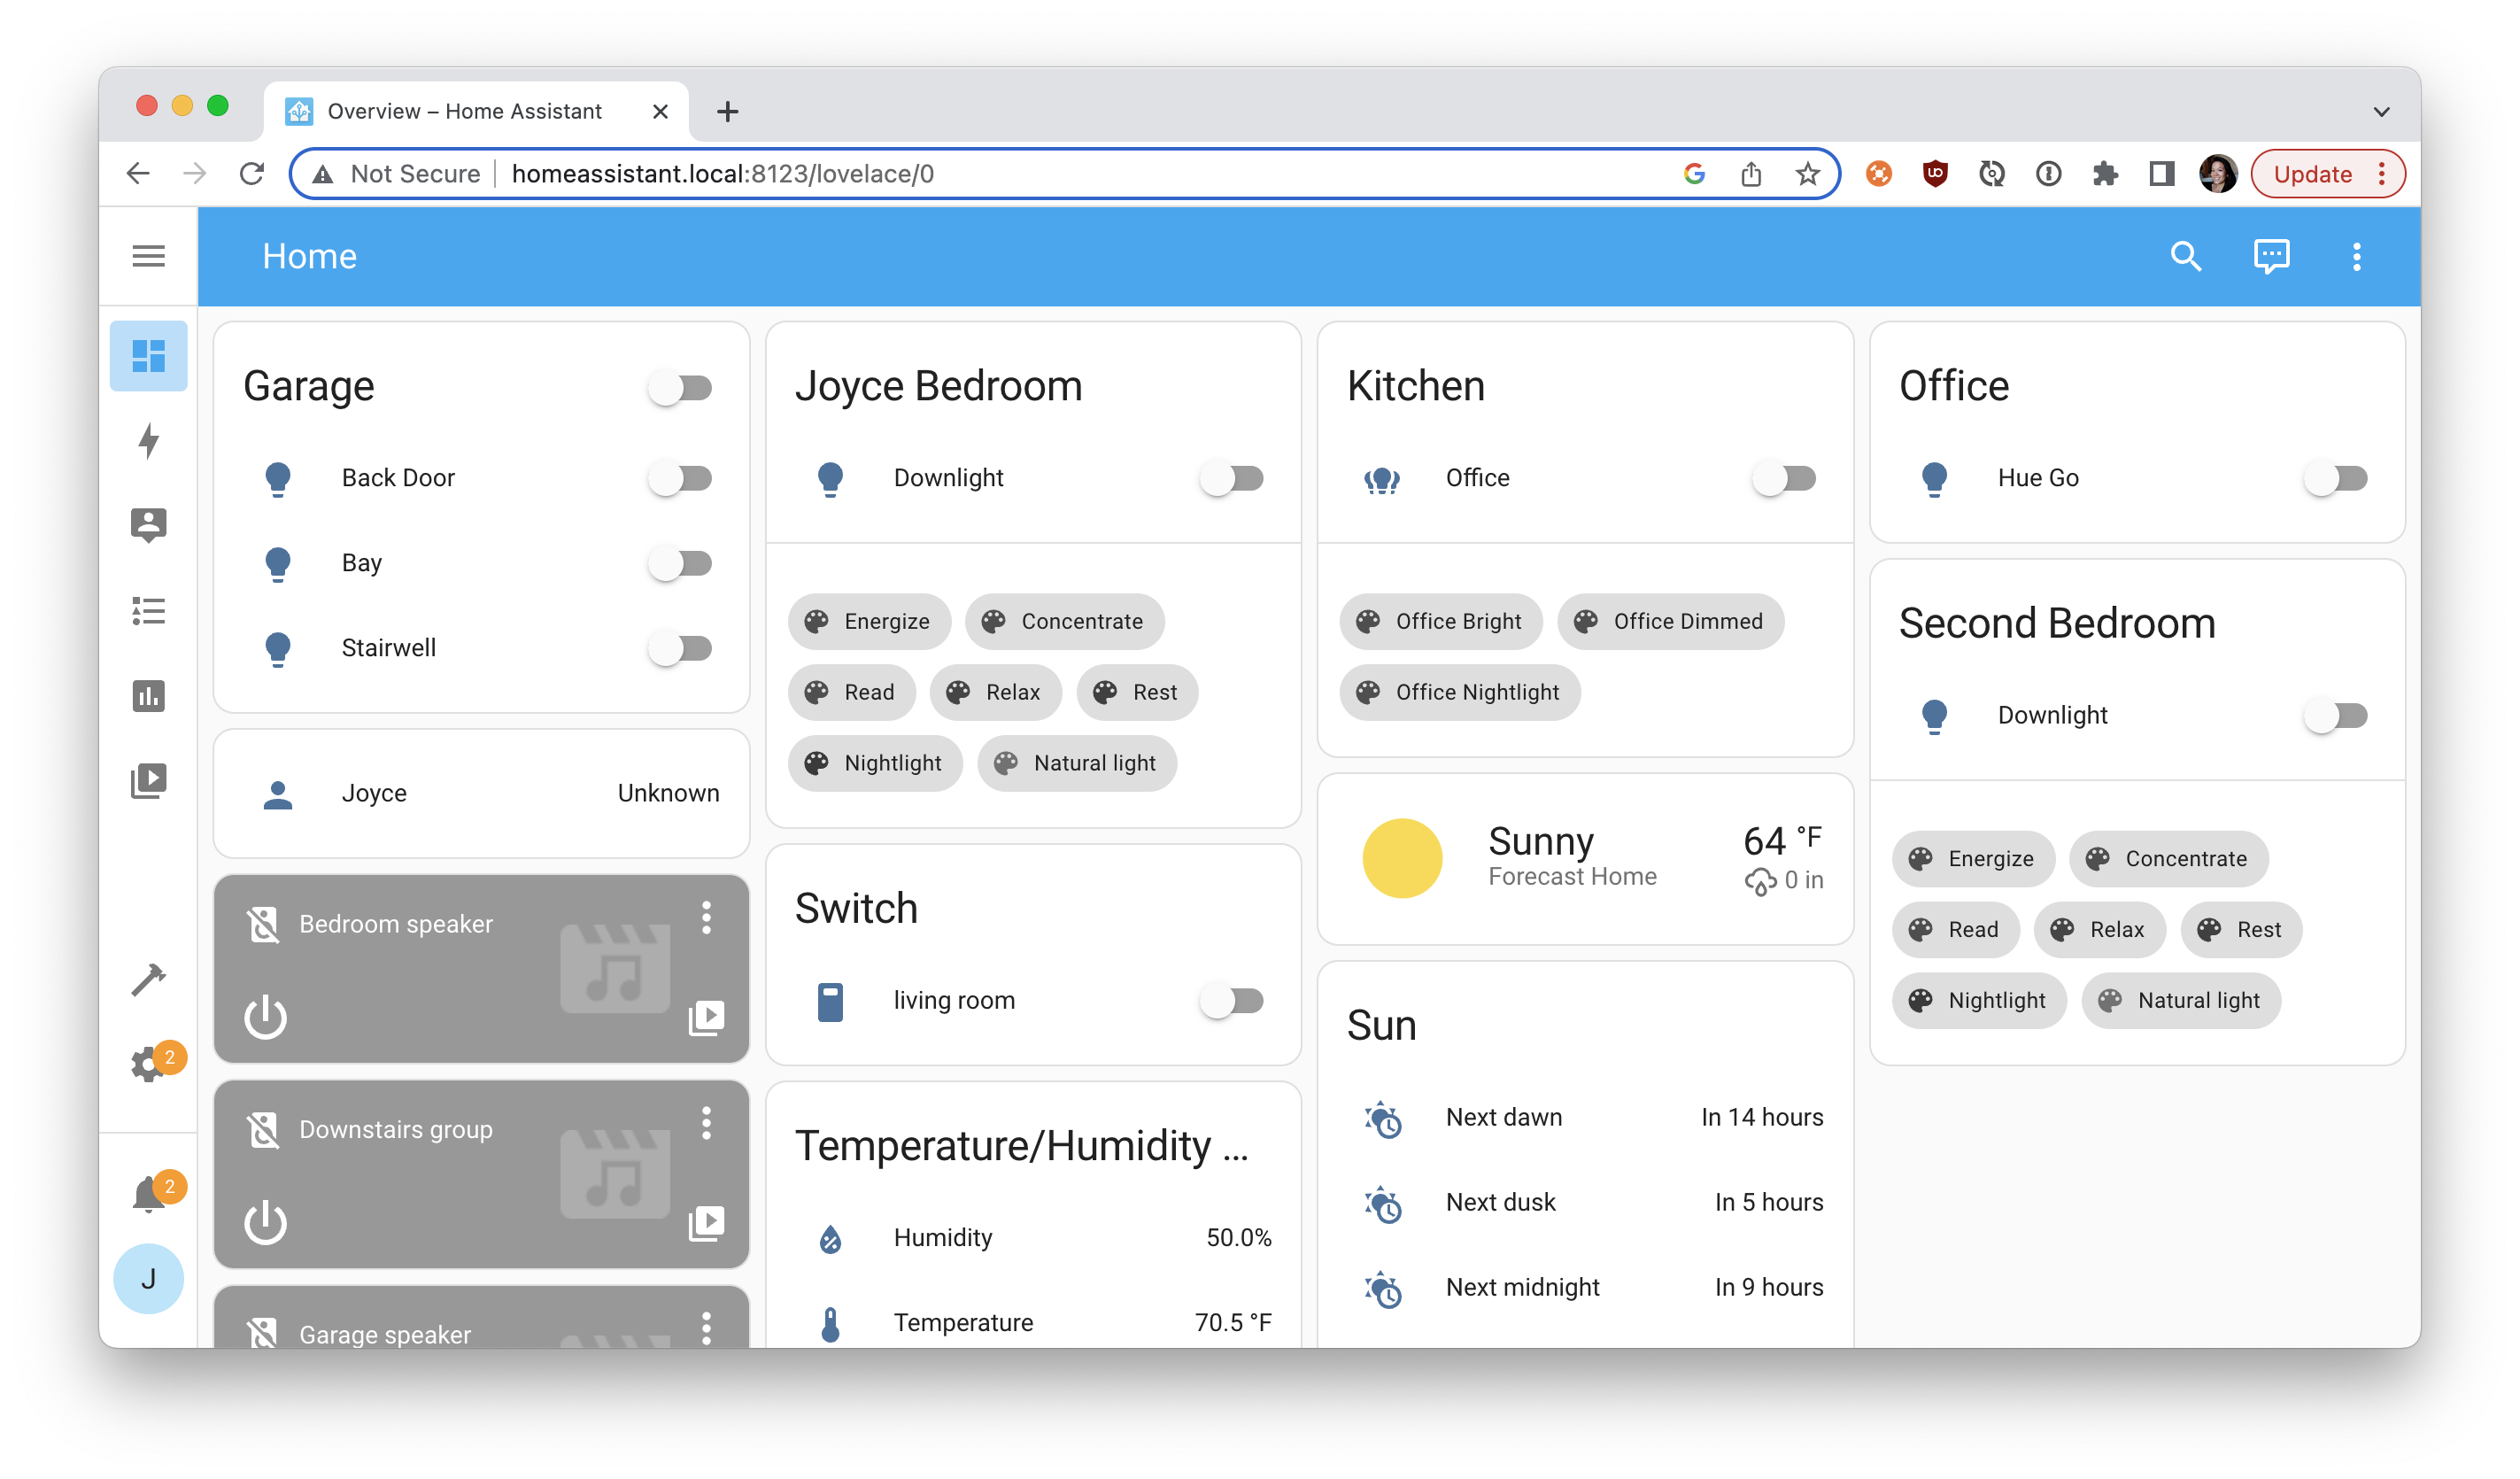
- Some connected device, such as smart lights, smart speakers, or digital assistant
What You'll Learn
- how to establish a WebSockets connection
- how to authorize Home Assistant APIs
- how to send and receive WebSocket messages
What You'll Need
- a Home Assistant Account
- Home Assistant instance running on local server, such as Raspberry Pi
- a Postman Account
What You'll Build
- A Postman collection with saved WebSocket messages
Watch this video to follow along at each step:
REST and WebSockets for connected home
When it comes to transmitting data in a connected home environment, both REST and WebSockets are commonly used protocols, but they have different characteristics and use cases.
REST follows a request-response pattern, where a client sends a request to a server, and the server responds with the requested data. This is useful for accessing and controlling smart devices and services, and works well for scenarios where data updates are not required in real-time. For example, REST is suitable for a one-off request to turn on a smart light.
On the other hand, WebSockets enables bidirectional communication between a client and server, enabling real-time data transmission. This is useful for applications that require continuous data updates, such as real-time monitoring of sensor data and displaying live dashboards. For example, WebSockets is suitable for continuously monitoring the temperature in a room over a persistent connection.
In the next section, let's take a look at a popular home automation platform that provides both REST and WebSocket APIs.
Home Assistant for home automation
Home Assistant is a popular open-source home automation platform that lets you control and monitor smart devices from different brands using a unified interface. Instead of using separate mobile apps to control your kitchen lights, thermostat, and smart coffee maker produced by different manufacturers, you can manage everything from a single Home Assistant dashboard running on a Raspberry Pi or other dedicated server within your local network.
Home Assistant is ideal for DIY smart home tinkerers because it supports a wide range of integrations and protocols, allowing you to create automation scenarios based on events, schedules, and sensor readings.
Next, let's take a look at Home Assistant's WebSocket API.
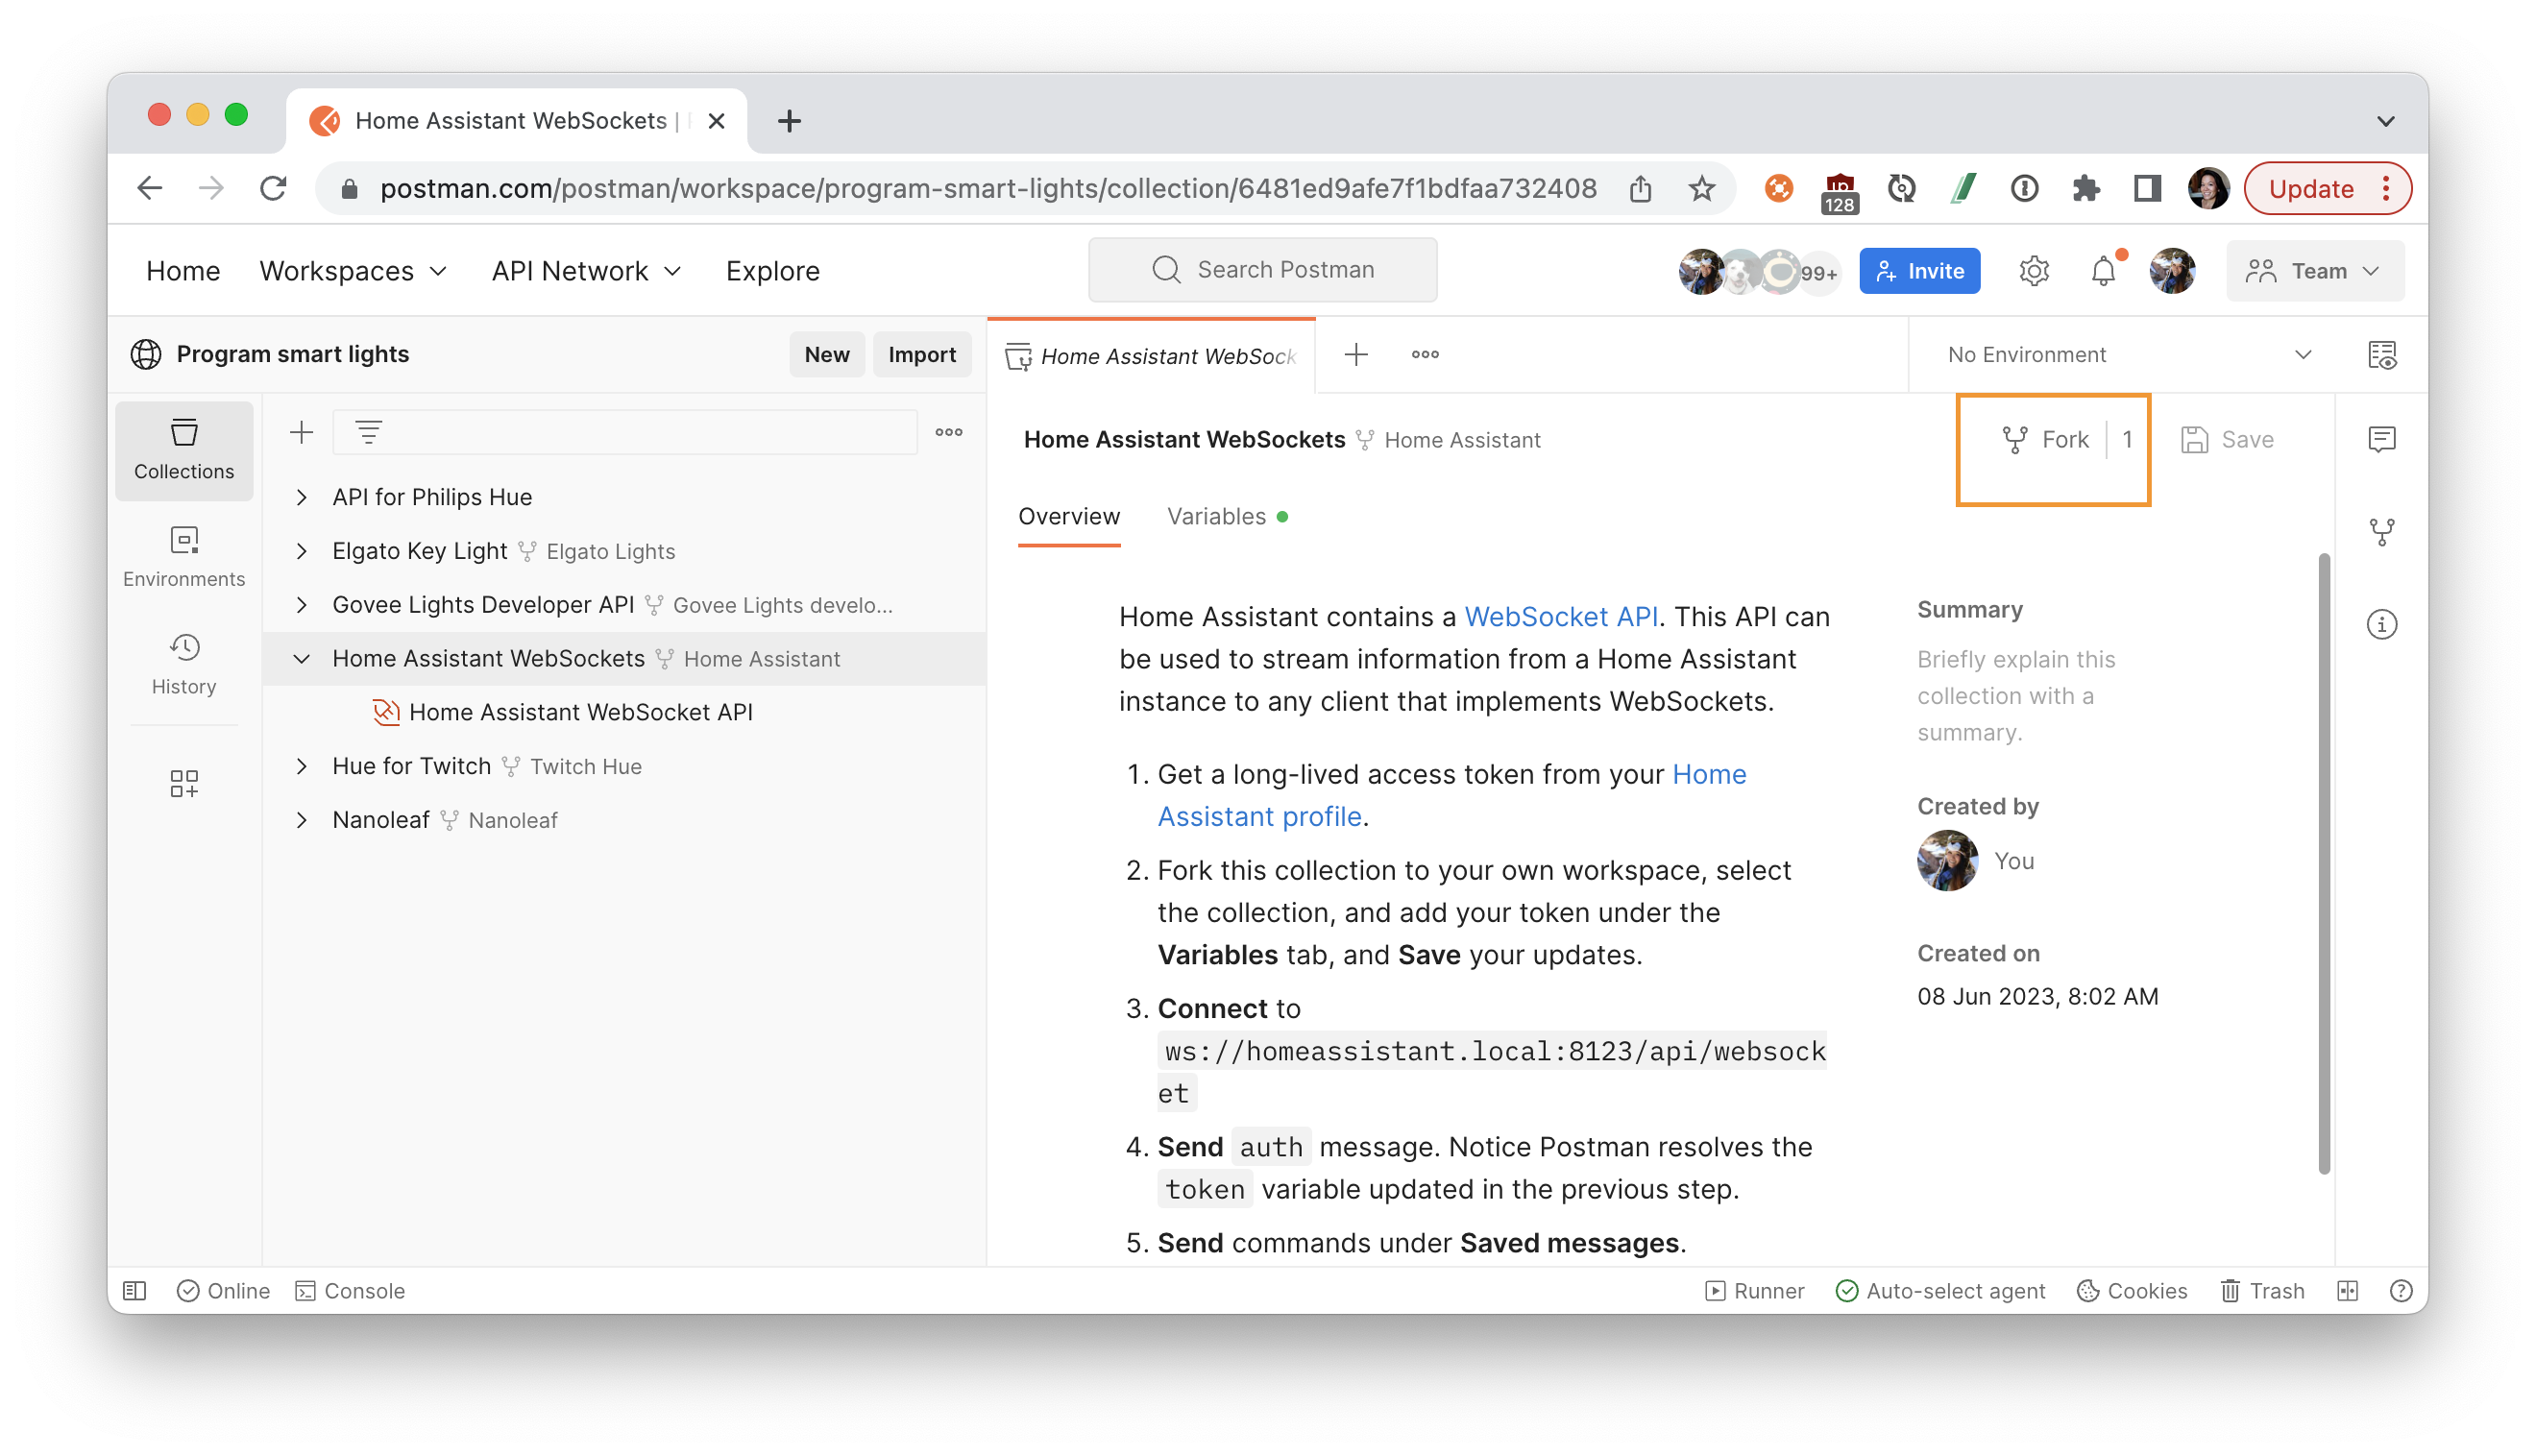
In addition to a REST API, Home Assistant also contains a WebSocket API to stream information. Using a long-lived token, you can use Postman to establish a connection with our Home Assistant server running locally, and then send and receive messages using the WebSocket API.
Fork the Postman collection
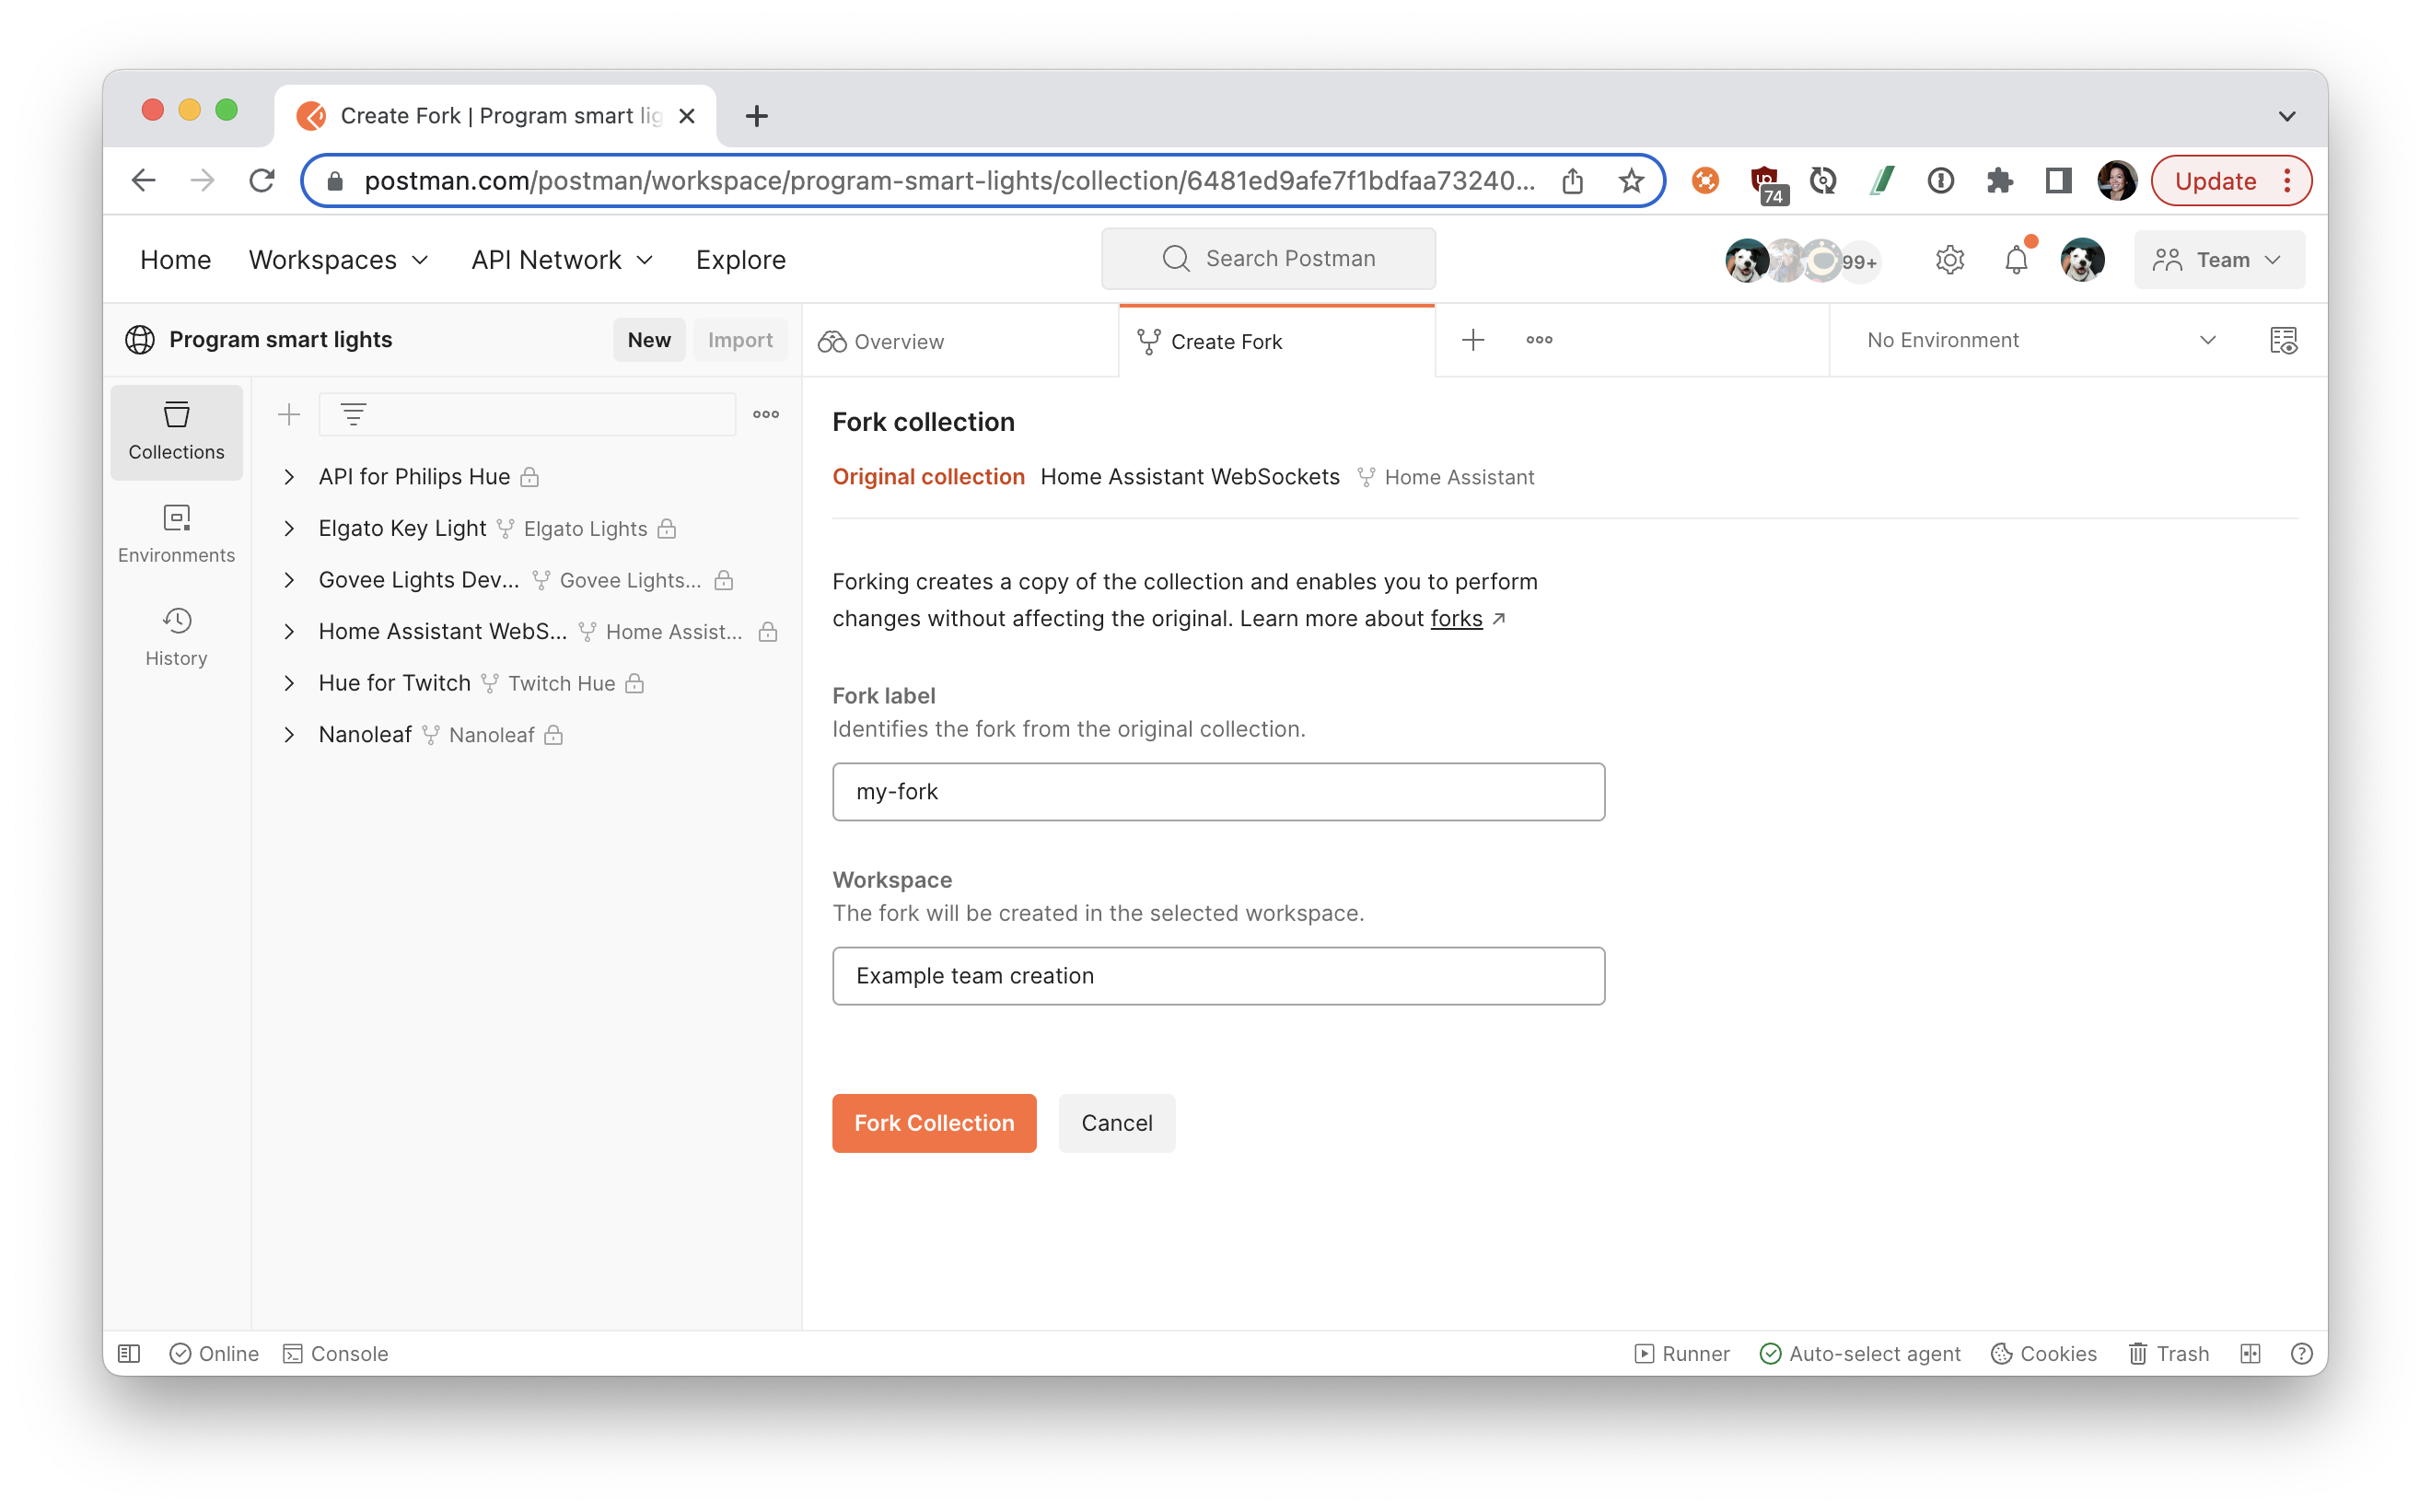
- Find the sample collection, Home Assistant WebSockets, and fork the collection to your own Postman workspace.
- Enter a label for your fork and select the workspace to fork the collection:
Create Home Assistant long-lived token
- Log in to Home Assistant
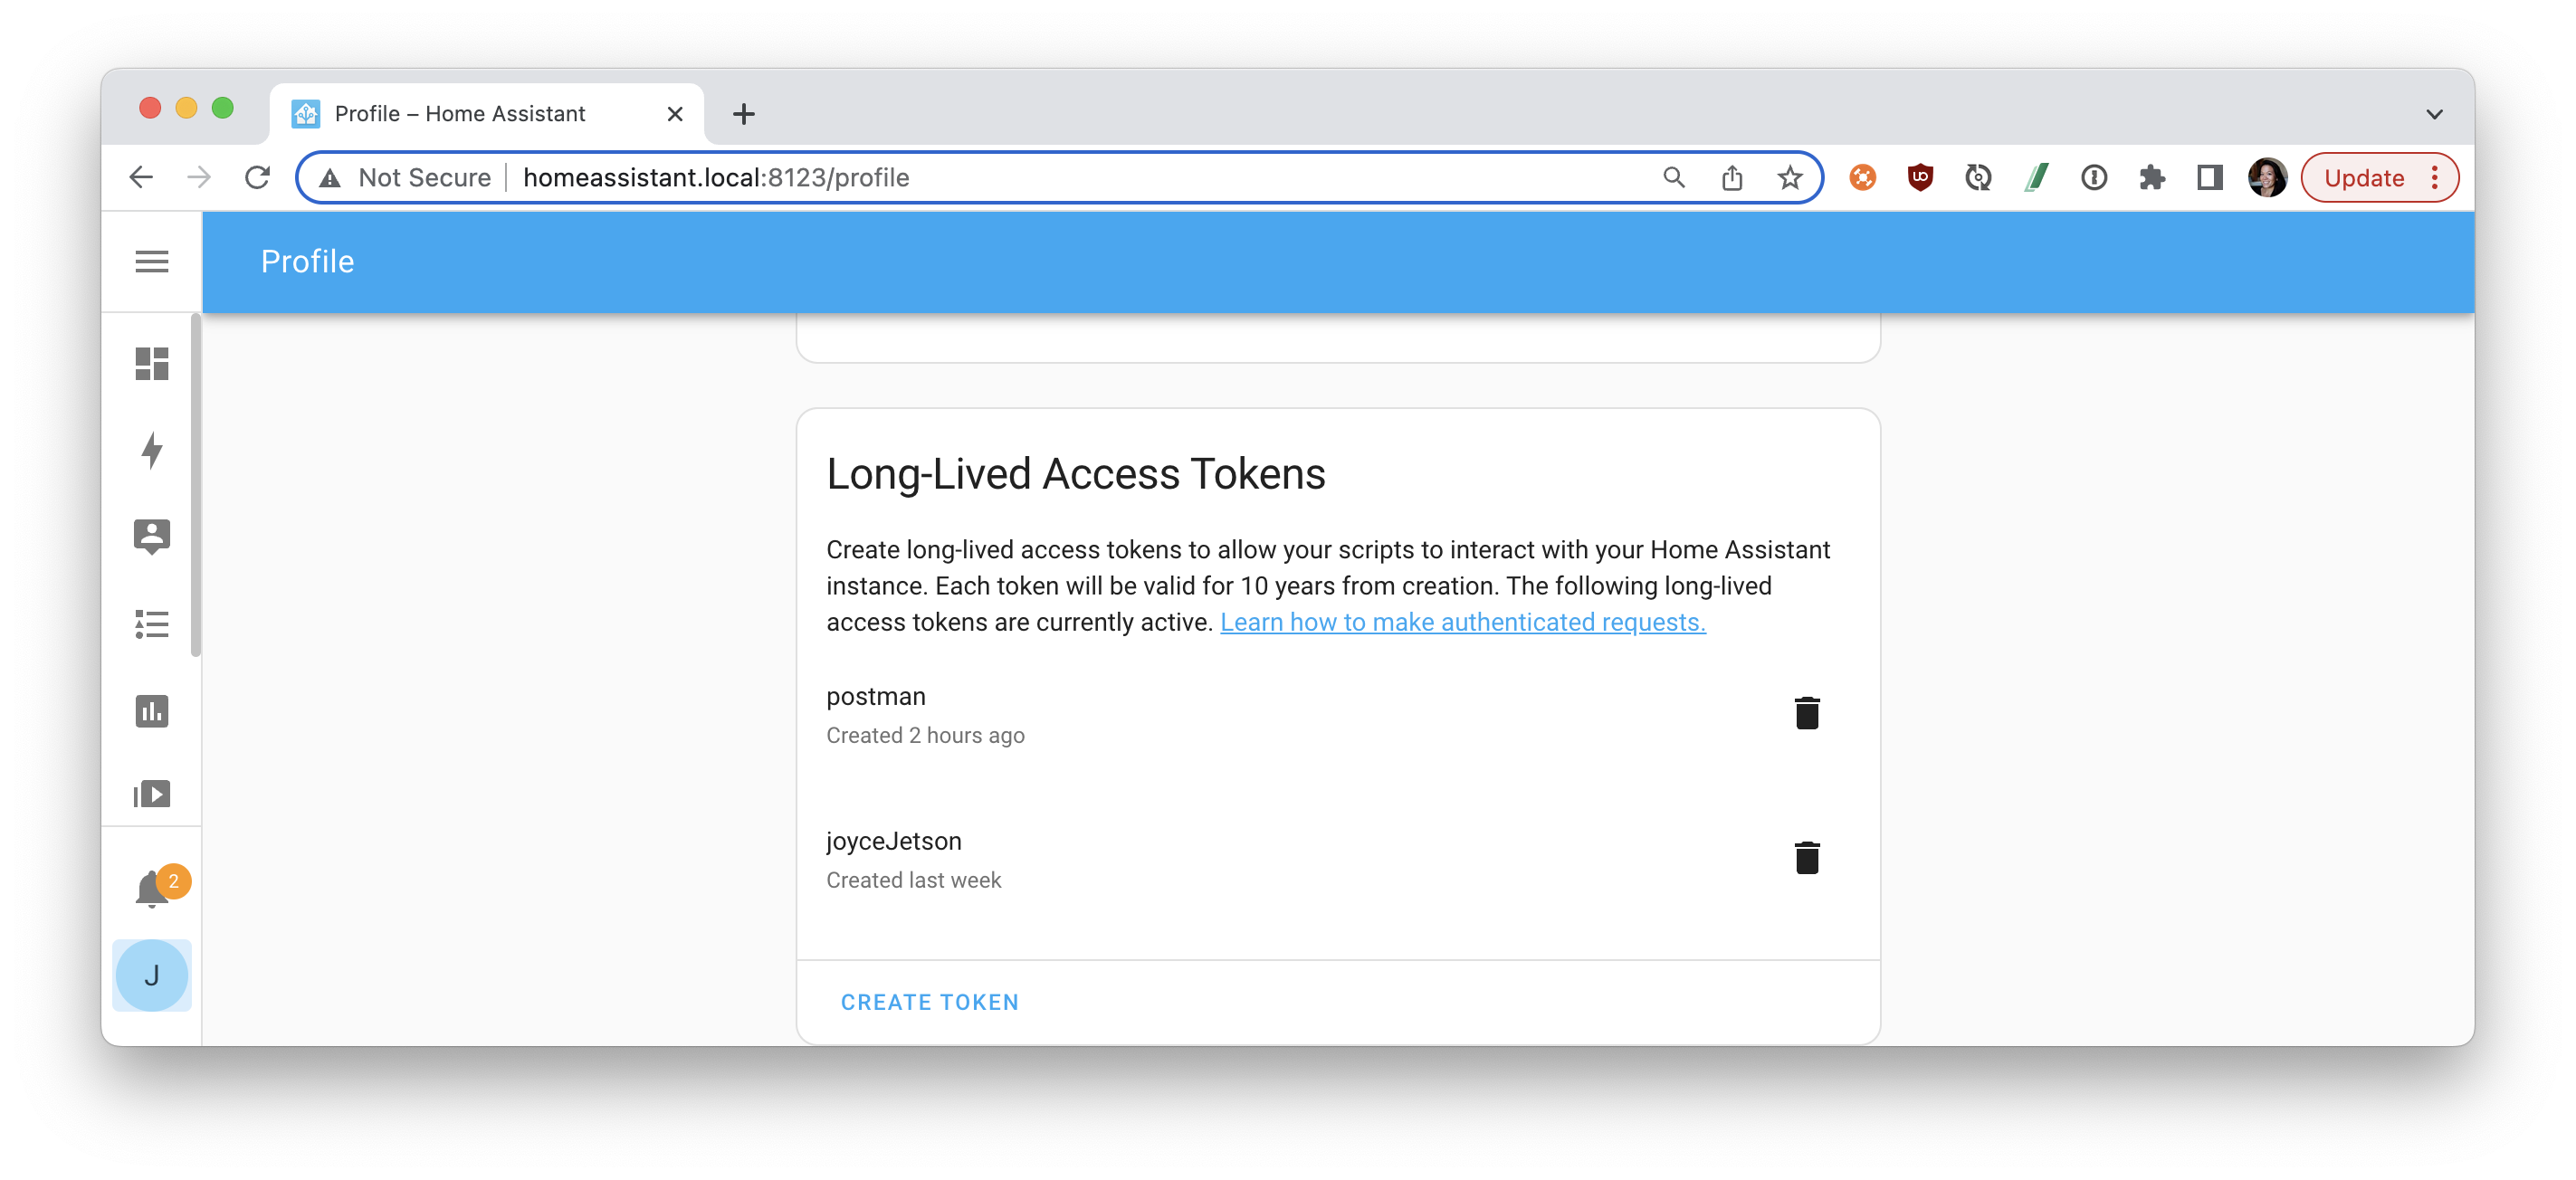
- Create a long-lived access token from the Home Assistant profile page.
- Let's save our token as a Postman variable, so that we can use it in our API requests. Select the Postman collection that you forked to your workspace. Find the Variables tab, and paste your long-lived access token as the
tokenvariable value.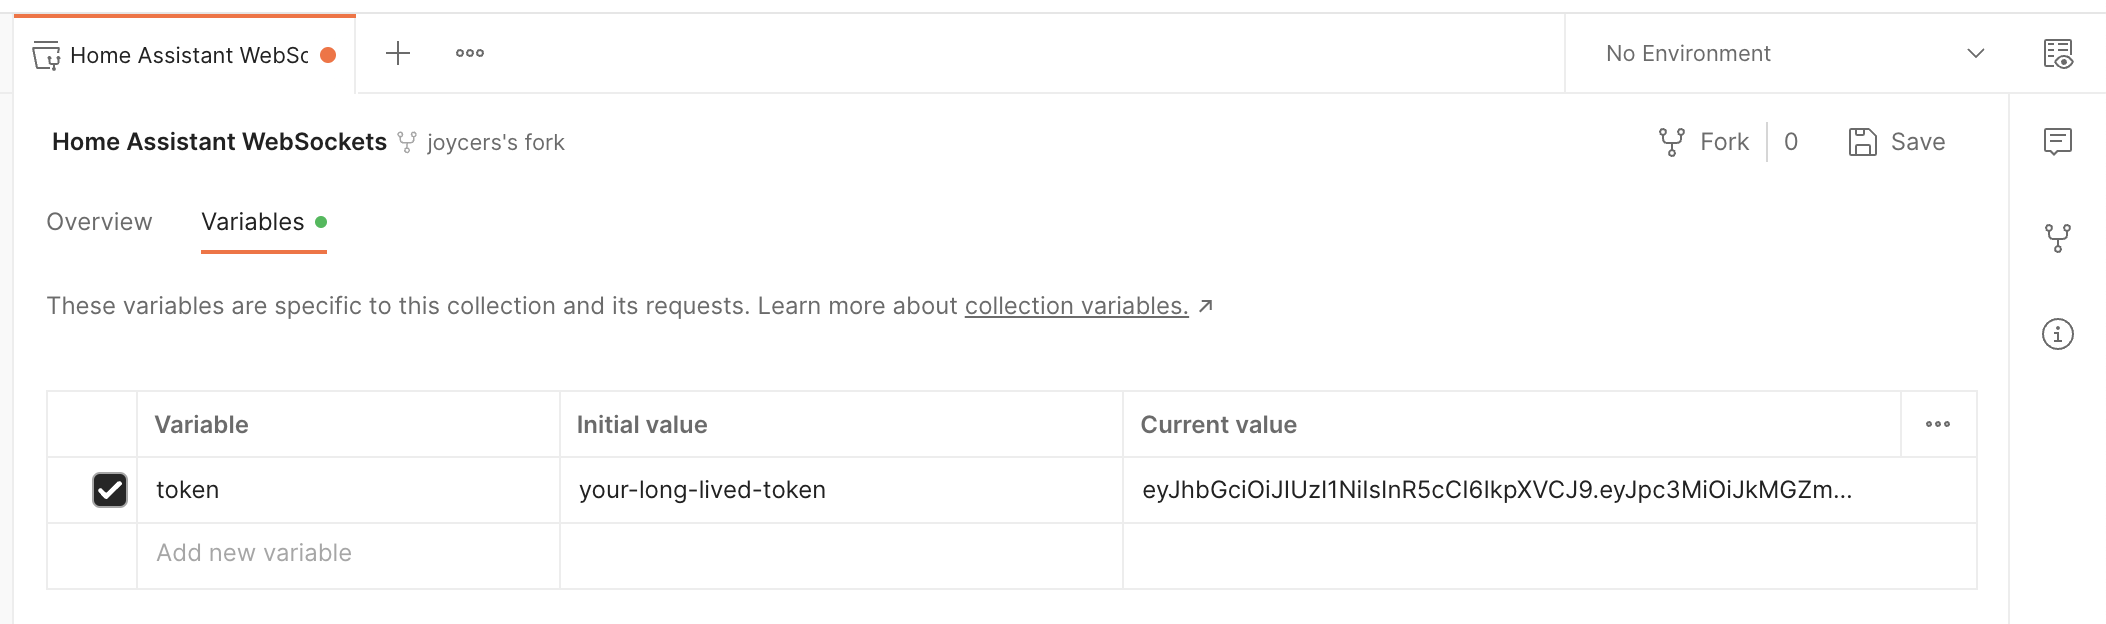
Authenticate the WebSockets connection
- Select the Postman collection that you forked to your workspace. Open the "Home Assistant WebSocket API" request, and click the Connect button.
- When a client connects to the server, the server sends out
auth_required.In the Response pane, you can inspect the message returned from the WebSockets server. You can further inspect the connection details by clicking on "Connected to ws://homeassistant.local:8123/api/websocket". The connection established between the Postman client and local server is bidirectional. In addition to receiving messages, Postman can also send them.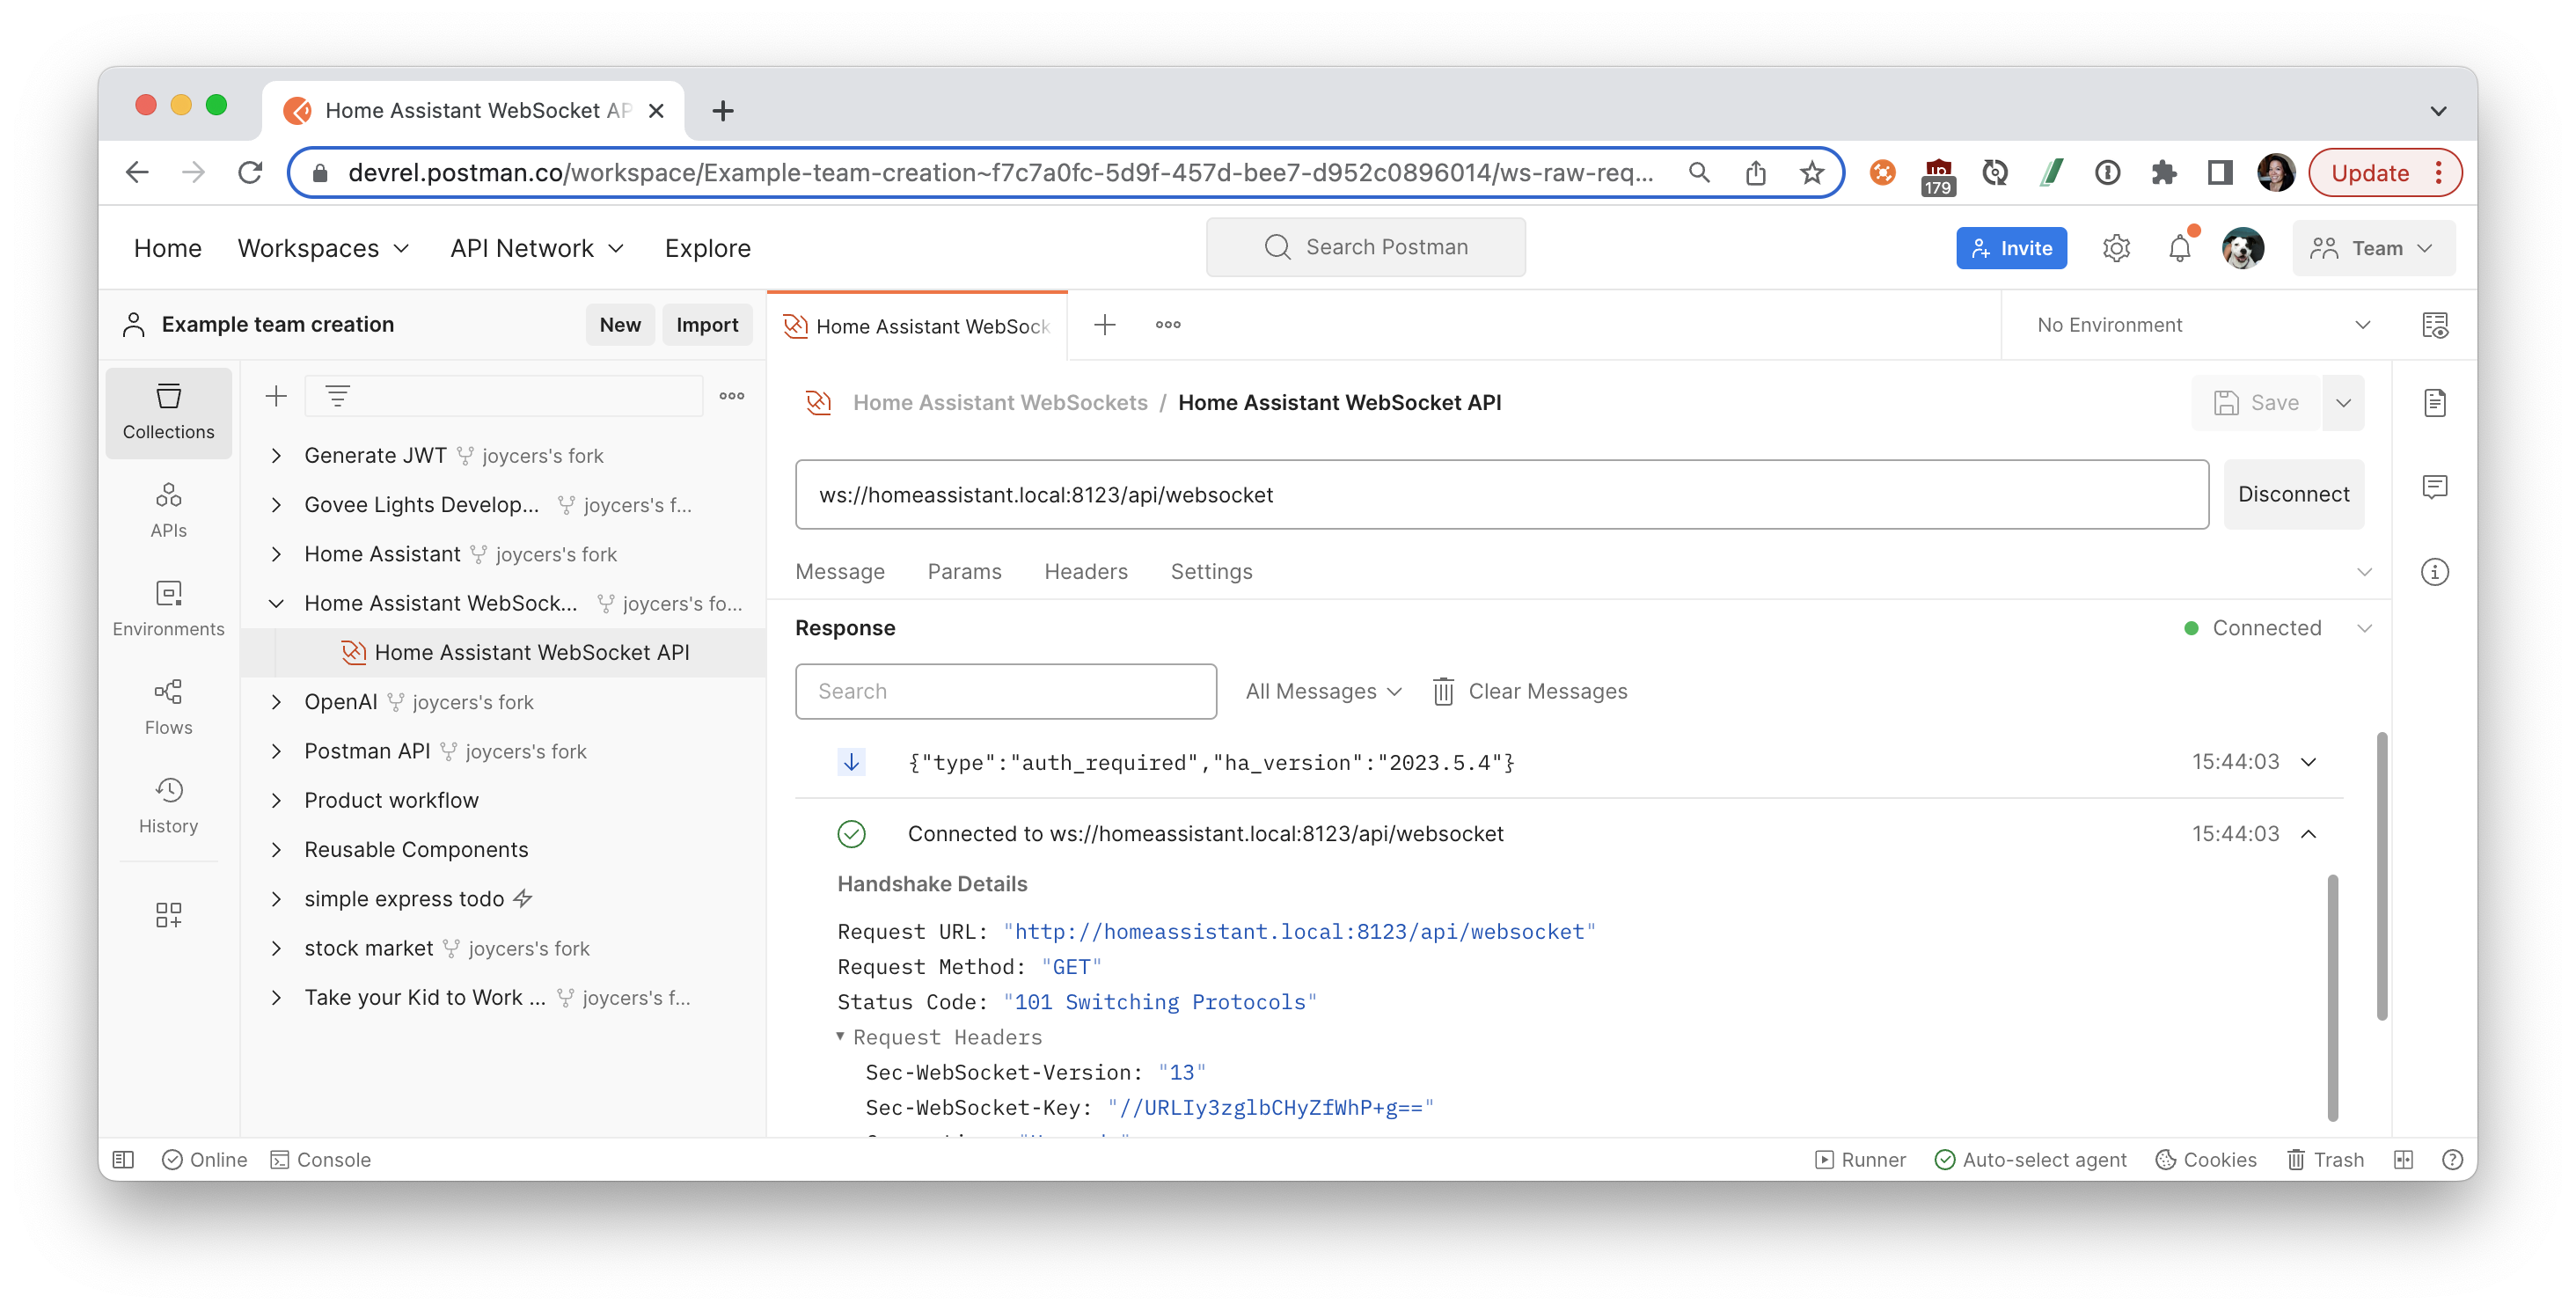
- The first message from the client should be an auth message that includes an access token. Under the Message tab, under Saved messages, select a message called
authto display a JSON message that includes yourtoken. If you were busy inspecting, the server may have disconnected from Postman. Connect once again, and then Send theauthmessage.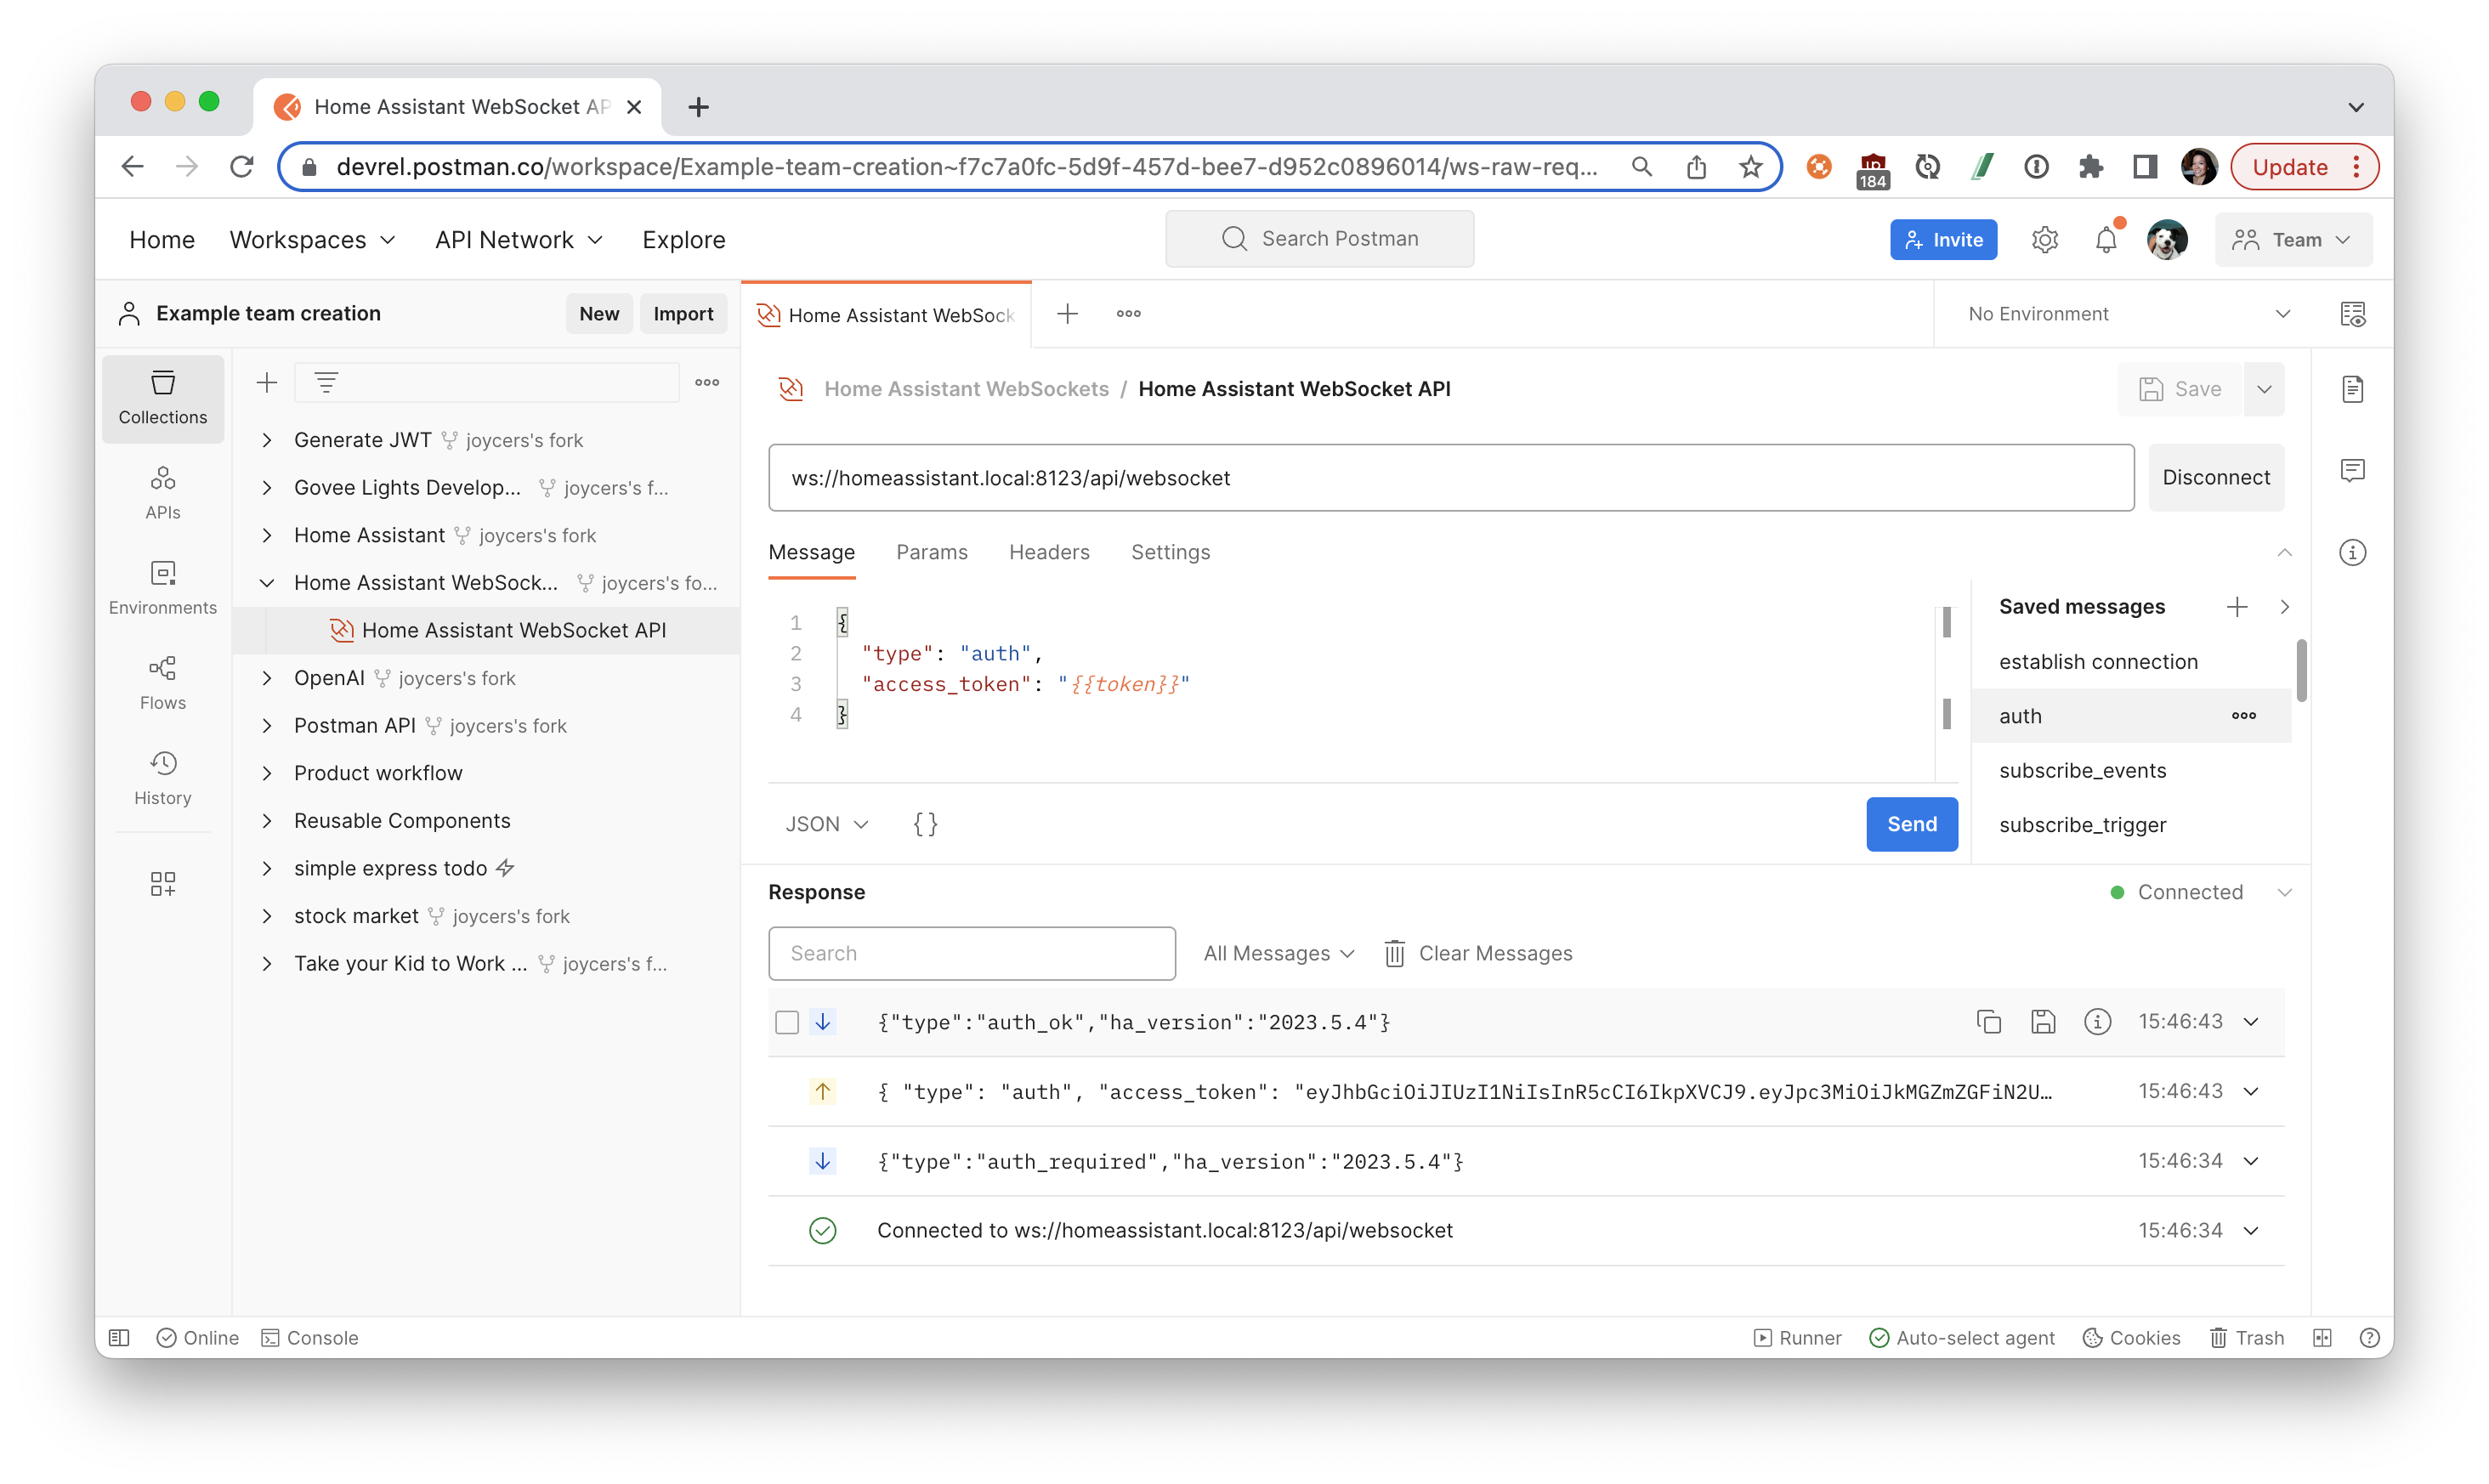
Send and receive messages
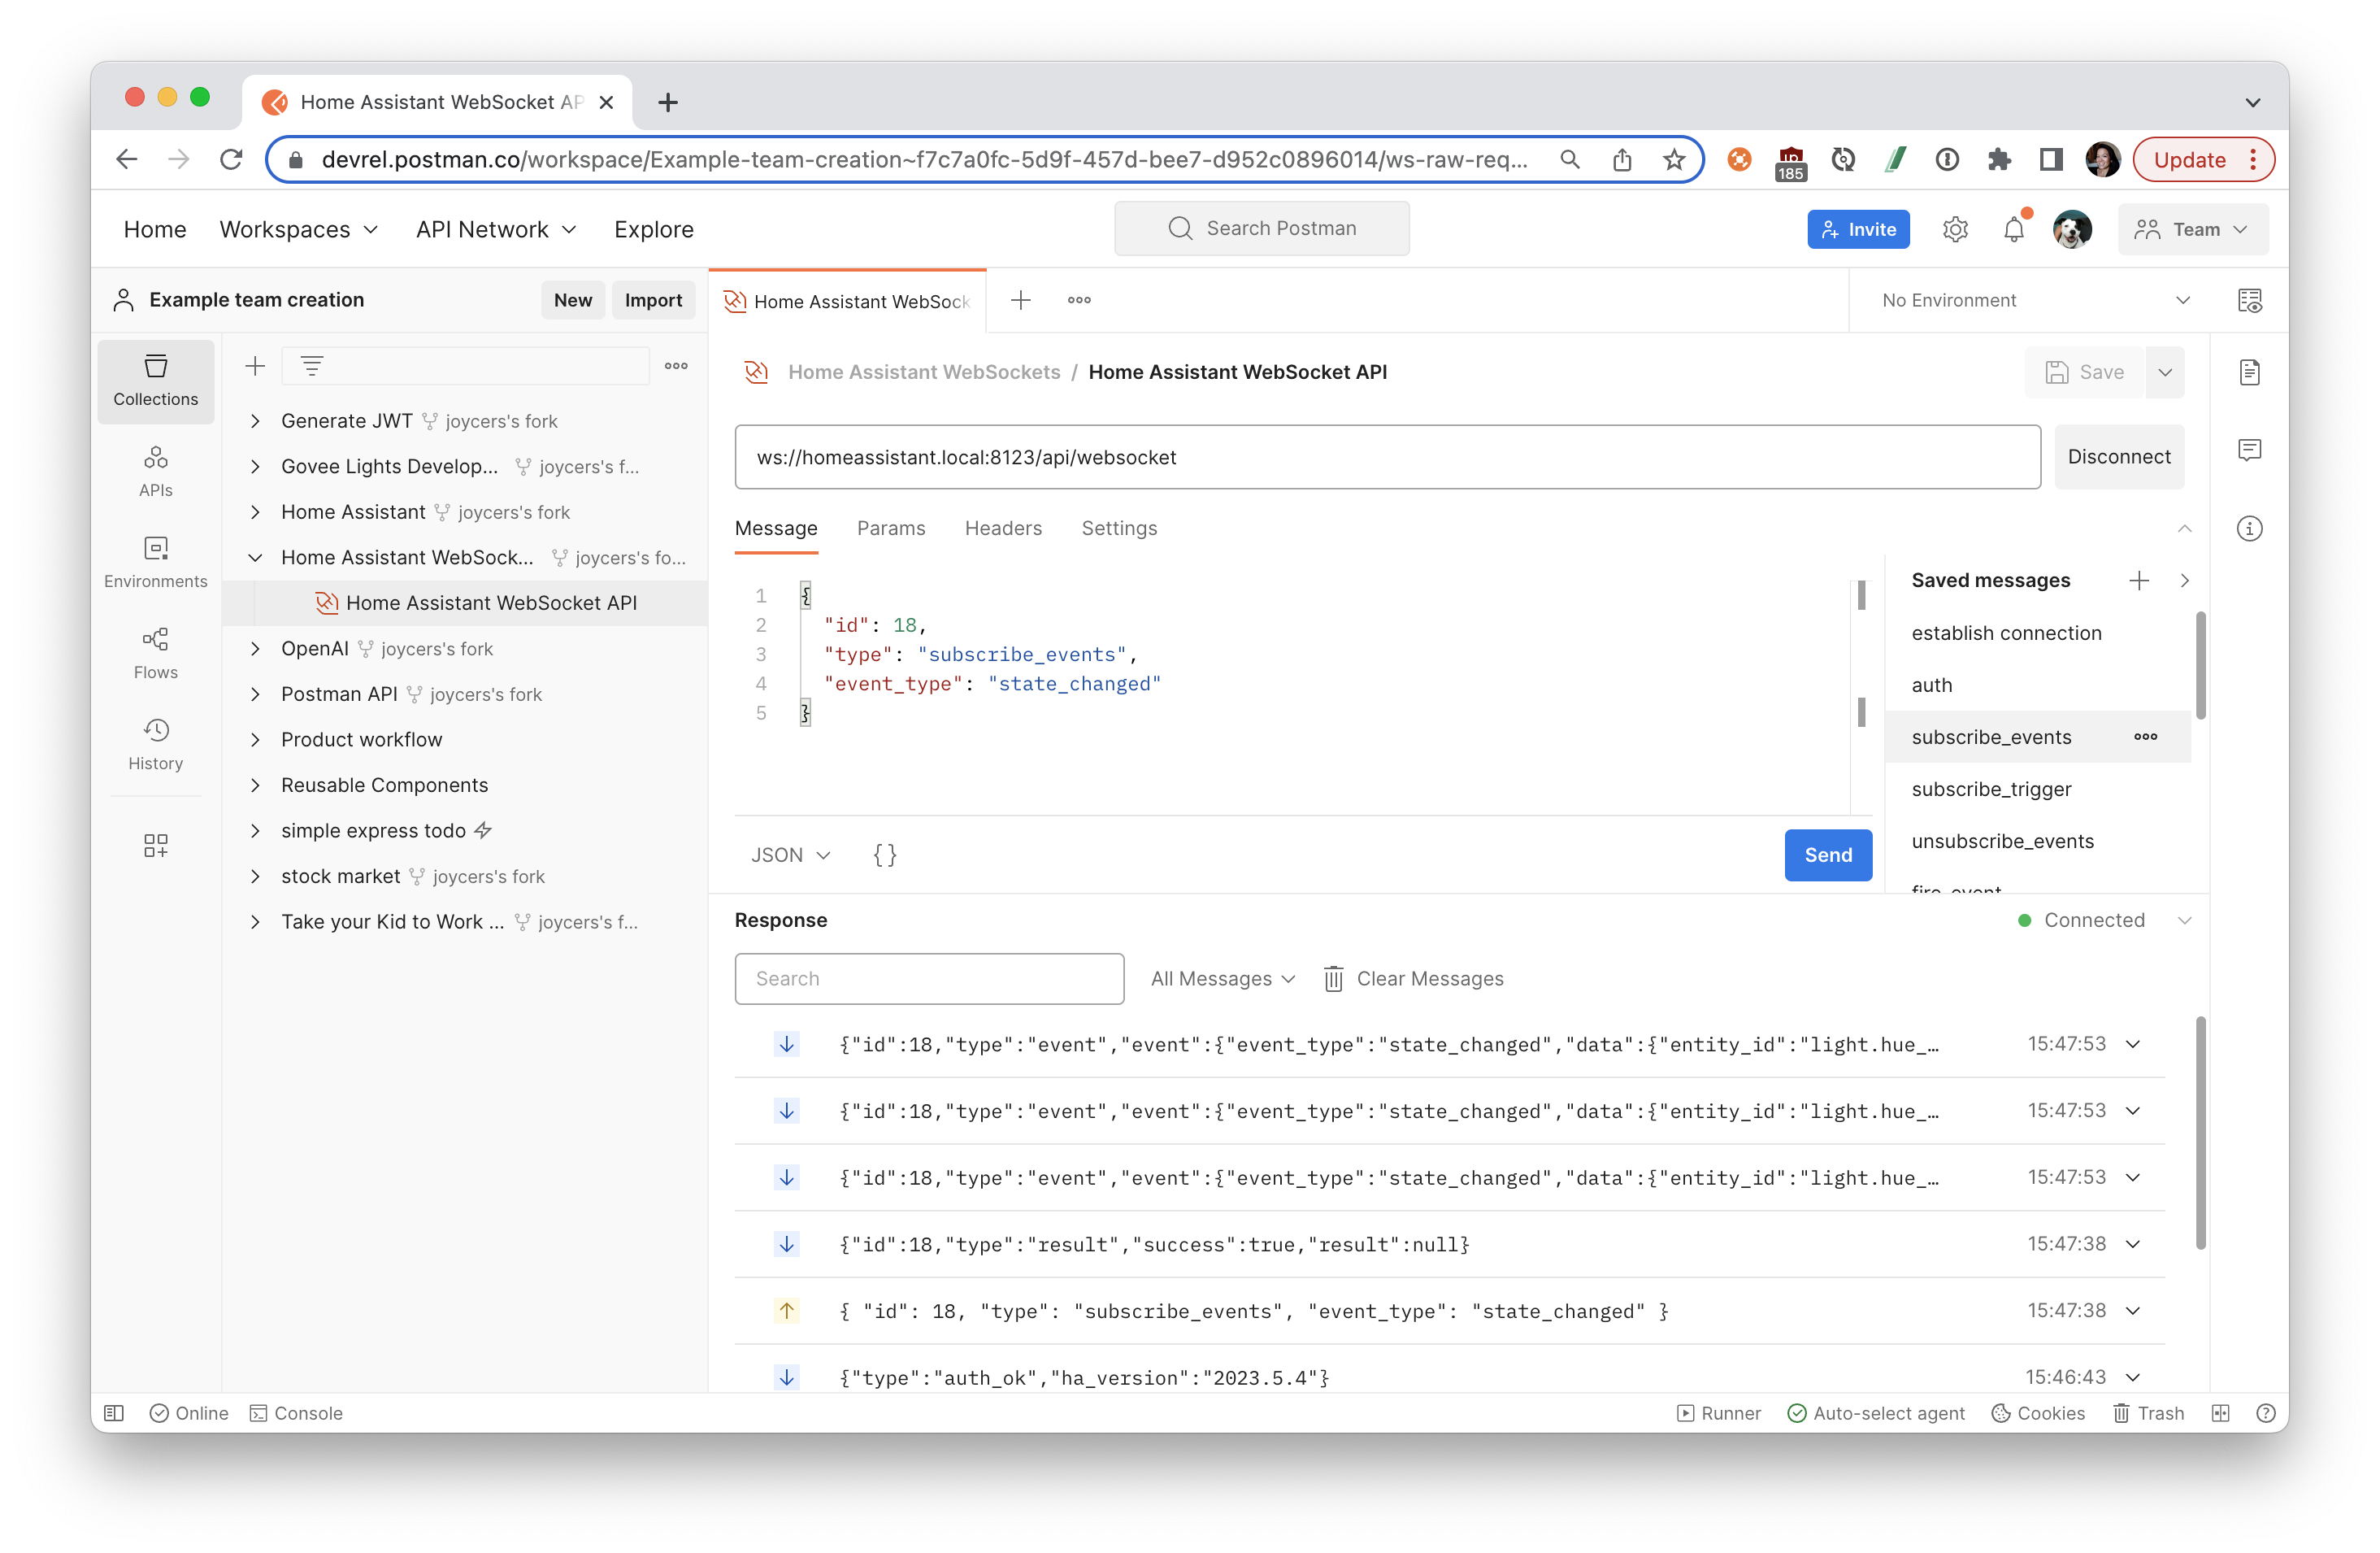
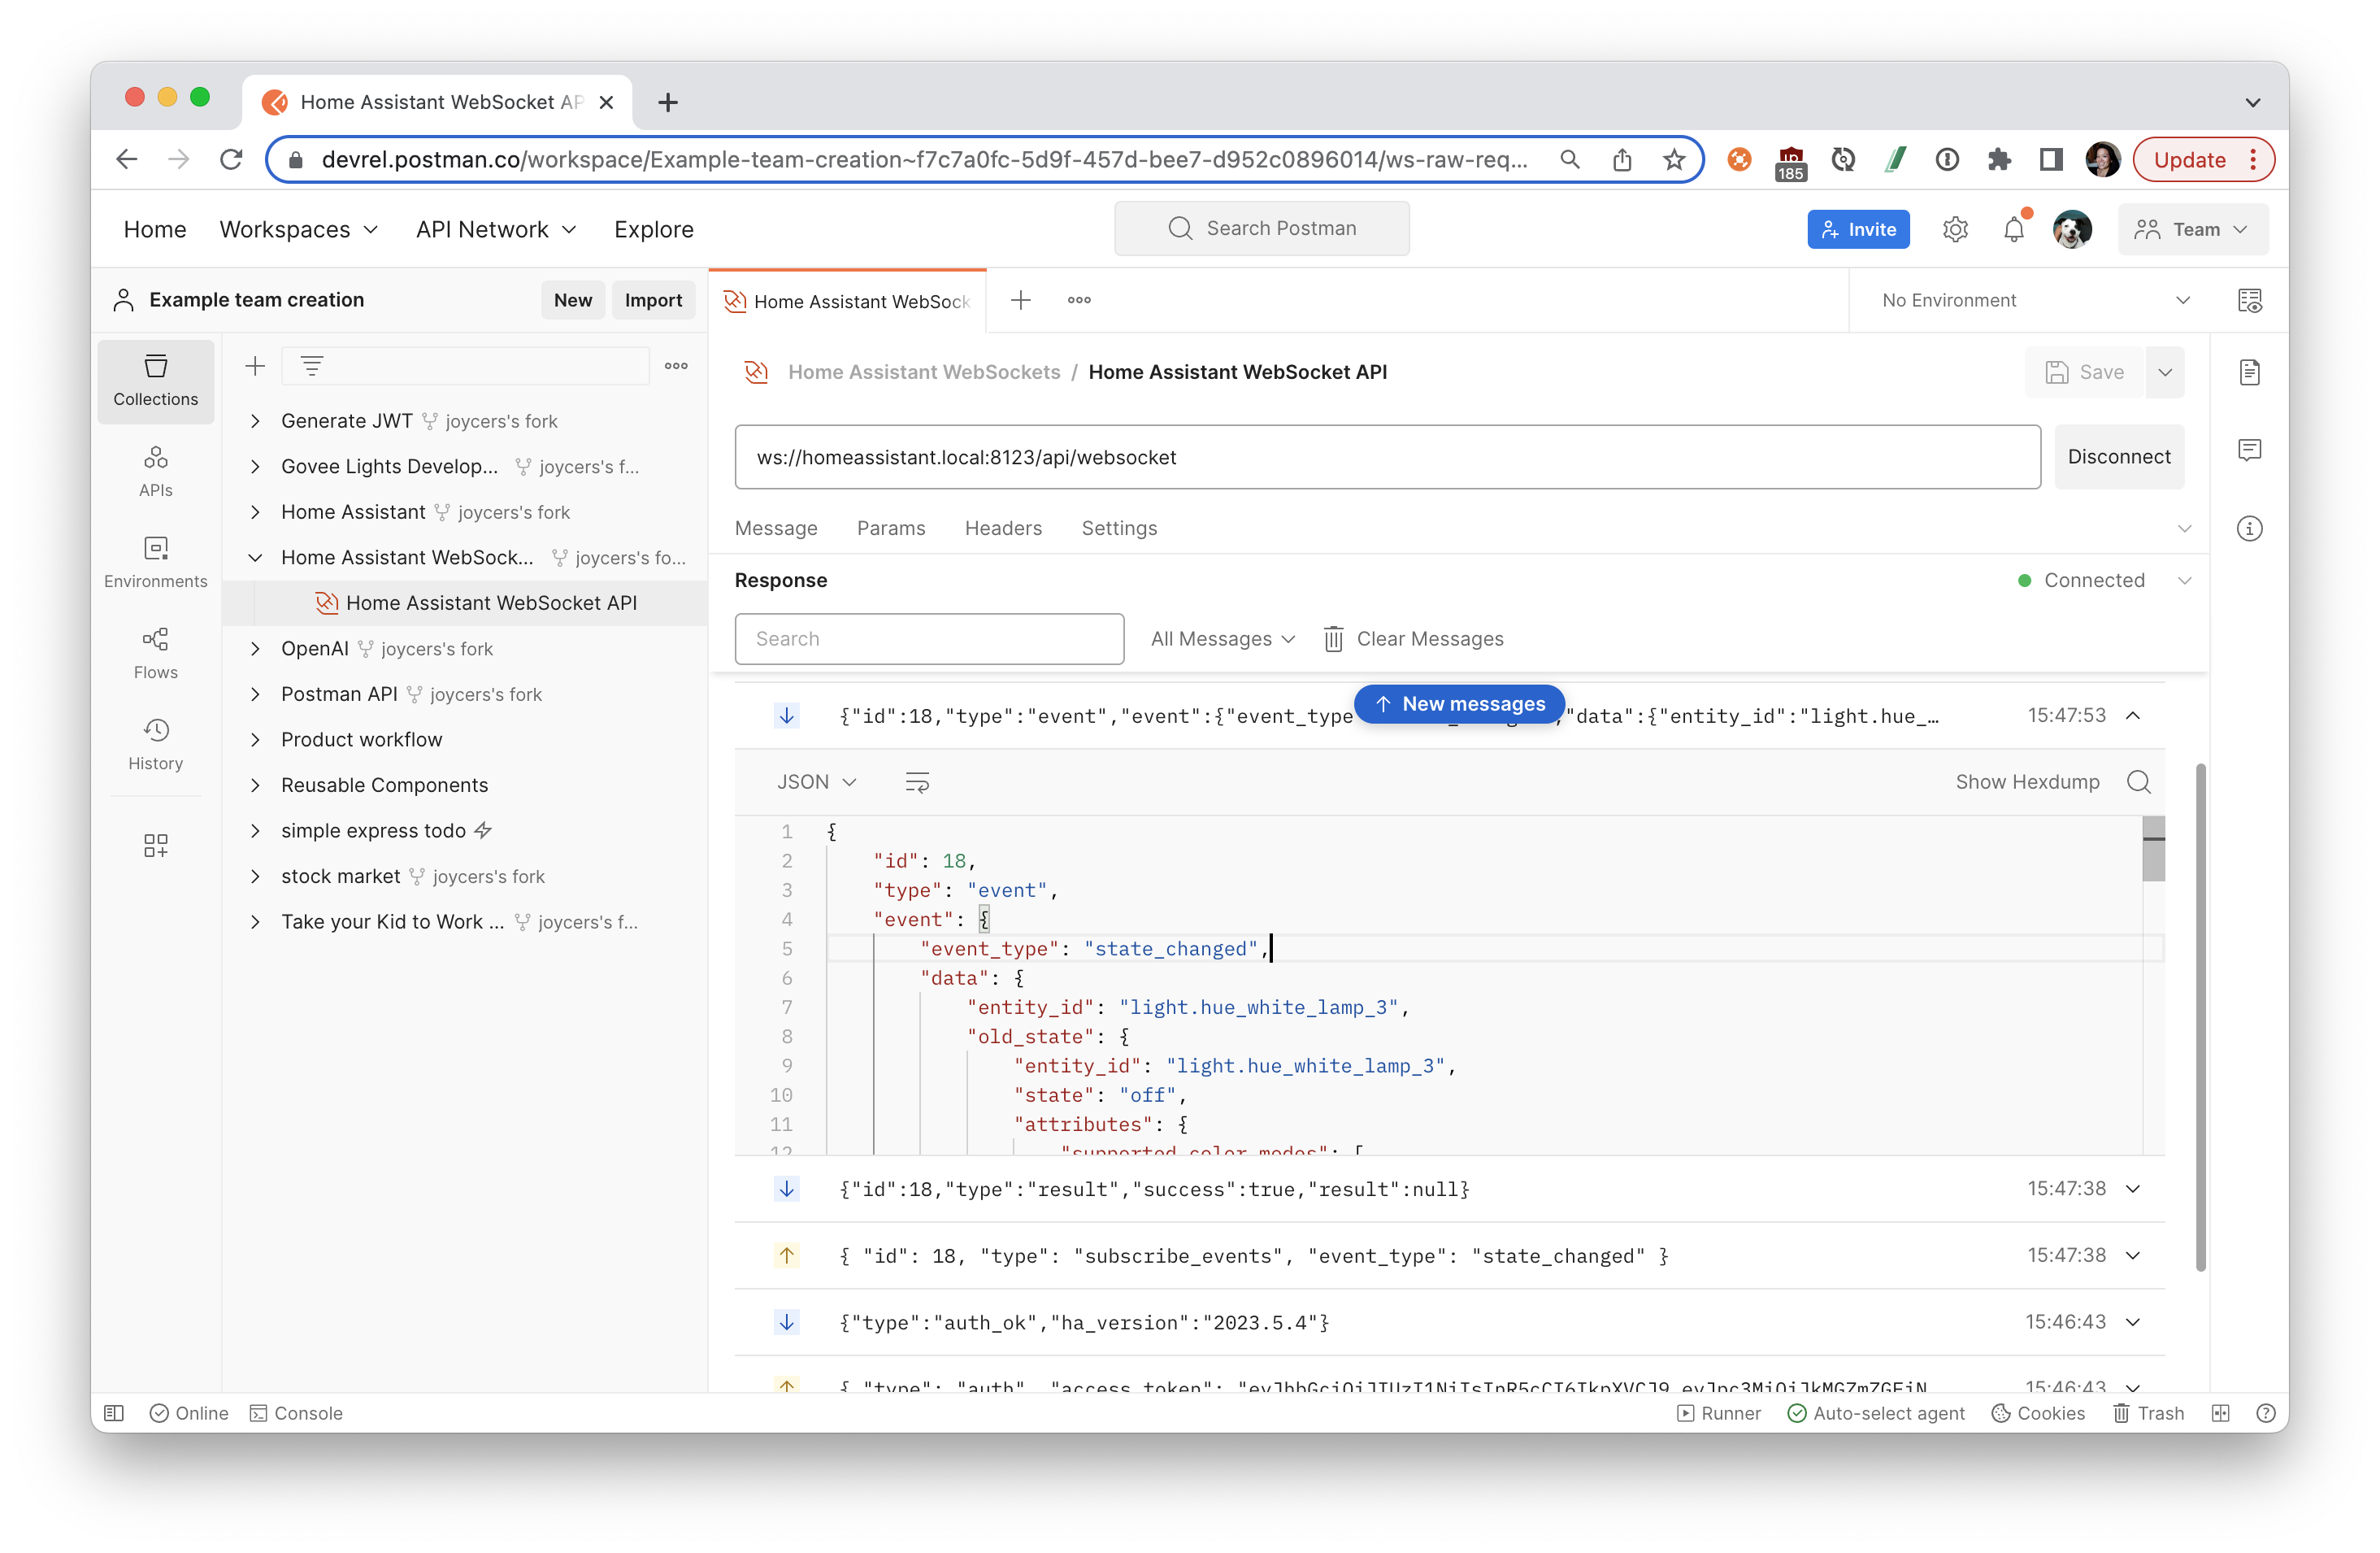
Once the connection is authenticated, you can send and receive messages. Select from Saved messages to initiate commands.
- The command
subscribe_eventswill subscribe your client to the event bus. You can either listen to all events or to a specific event type. Find a Saved message calledsubscribe_eventsthat contains the following message, and Send.
{
  "id": 18,
  "type": "subscribe_events",
  "event_type": "state_changed"
}
- Once you subscribe to listen to all events, you will receive a message when the state changes on any device connected to Home Assistant.
- For each message that you send or receive, you can expand the message details.
- If the Response pane becomes too busy, you can Clear messages, and filter the messages by text or sent or received.

Continue exploring the other Saved messages within this collection. Once you learn how to work with Home Assistant WebSockets APIs, you can build your own custom integrations and notifications.
Watch this video to recap the steps:
What we've covered
- how to establish a WebSockets connection
- how to authorize Home Assistant APIs
- how to send and receive WebSocket messages
For more hands-on tutorials, check out these resources.
- Set up a WebSockets server in Node.js quickstart
- Set up a WebSockets server in Python quickstart
- Contribute your own tutorials here
Additional resources
- Home Assistant WebSocket API documentation
- Home Assistant REST API documentation
- Home Assistant REST API: Postman collection
- Program smart lights: Postman public workspace